Christmas Cookies: Swedish Kringla and Pumpkin Gingerbread

So if anyone else is like me, you’re way behind on your Christmas festivities (like started everything the weekend before the holiday late). I heavily rely on places with 2-day shipping because I never know what to buy until last minute. Time also ran way away from me this year – where has 2016 gone?

Luckily, I never need an excuse to bake and whipped up a few batches of some favorite Christmas cookie – one old and one new.

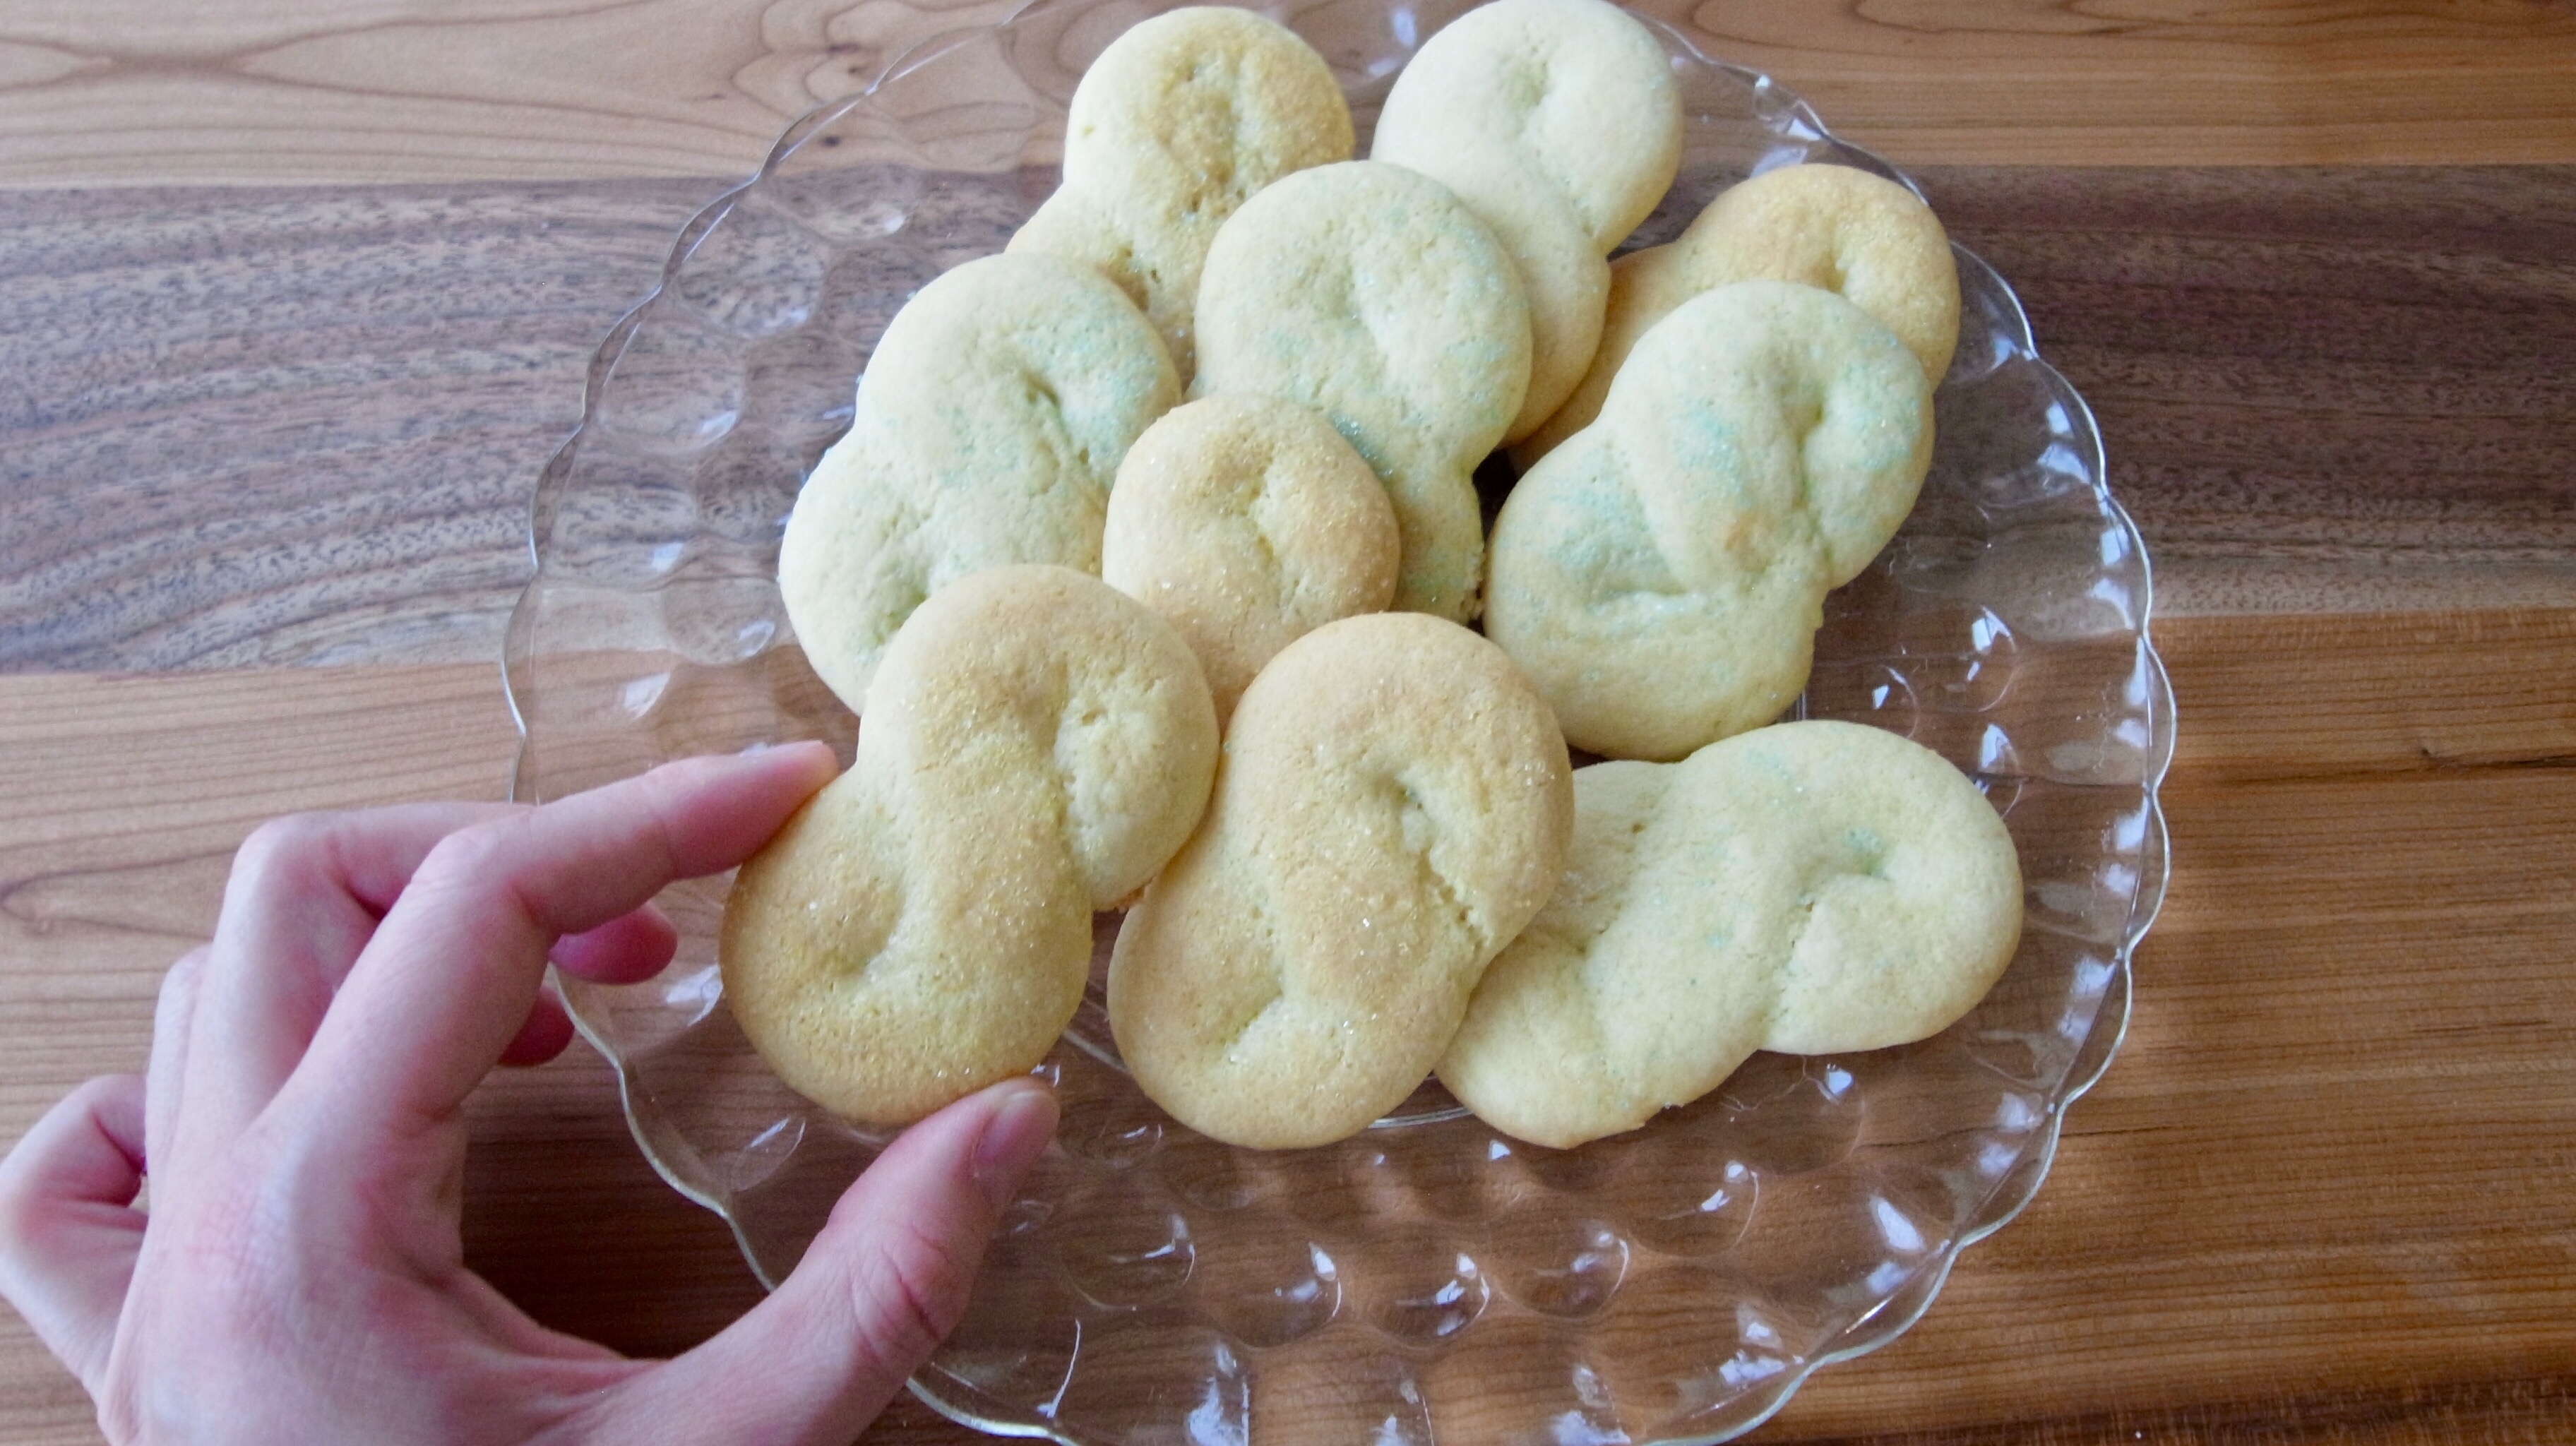
Let’s start with the old. This Kringla recipe is actually a recipe I shared on my old blog before, but just had to again. They have a light soft texture, mild flavor with a hint of buttermilk, and generally can be sprinkled with various colored sugar. The recipe originally came from a secretary in my dad’s office who’s a fantastic baker.  She used to send home tins full of Kringla during the holidays and one year sent the recipe too.  I took that recipe and have made them every Christmas since.

Kringla
Makes ~4-5 dozen

Ingredients

1 1/4 c. sugar
1/2 c. butter
2 egg yolks
1 tsp soda
1 tsp baking powder
1/2 tsp salt
3 cups flour*
3/4 buttermilk

Directions

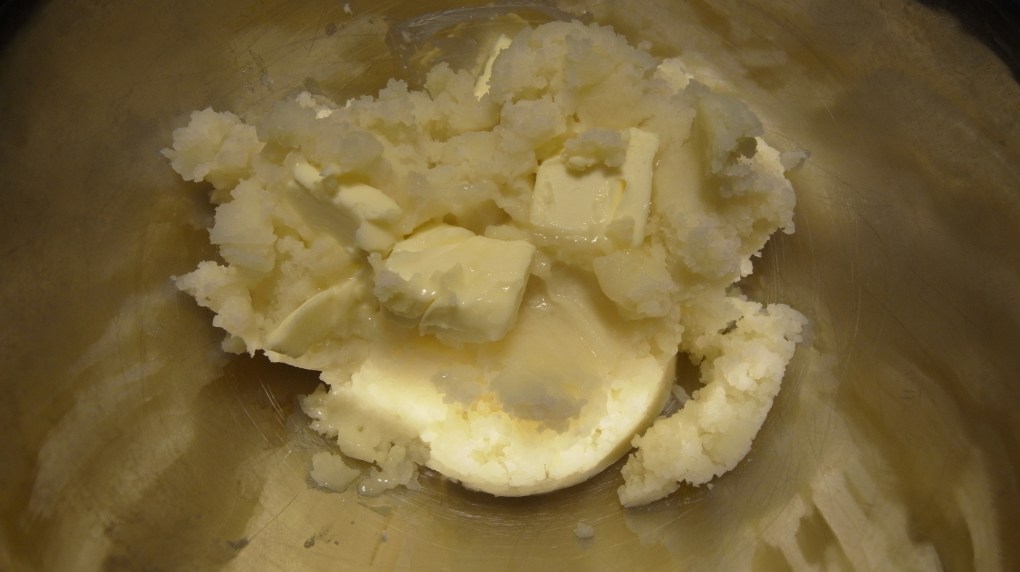
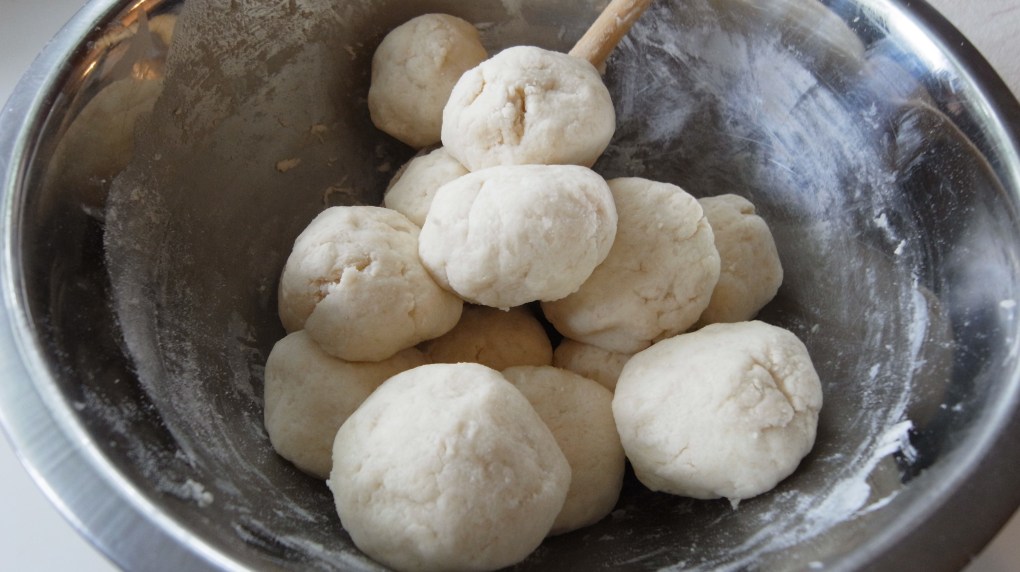
Mix butter, egg yolk, salt, sugar, and a small amount of buttermilk in a mixer until fluffy.  Add remaining buttermilk, soda, and mix slightly until well blended.  Add 1 cup flour and baking powder, beat until well blended.  Stir in 2 cups of flour.  Chill several hours.  Form and bake at 350F for 8-9 minutes or until bottoms are golden brown but tops remain light colored.

To form the figure 8 shape, roll a heaping teaspoon full of dough into a “rope” twist into an “8” shape and lay on parchment lined baking sheets.  Sprinkle with colored sugar as desired.

*If you’re making these at high altitude add ~2-3T of additional flour.

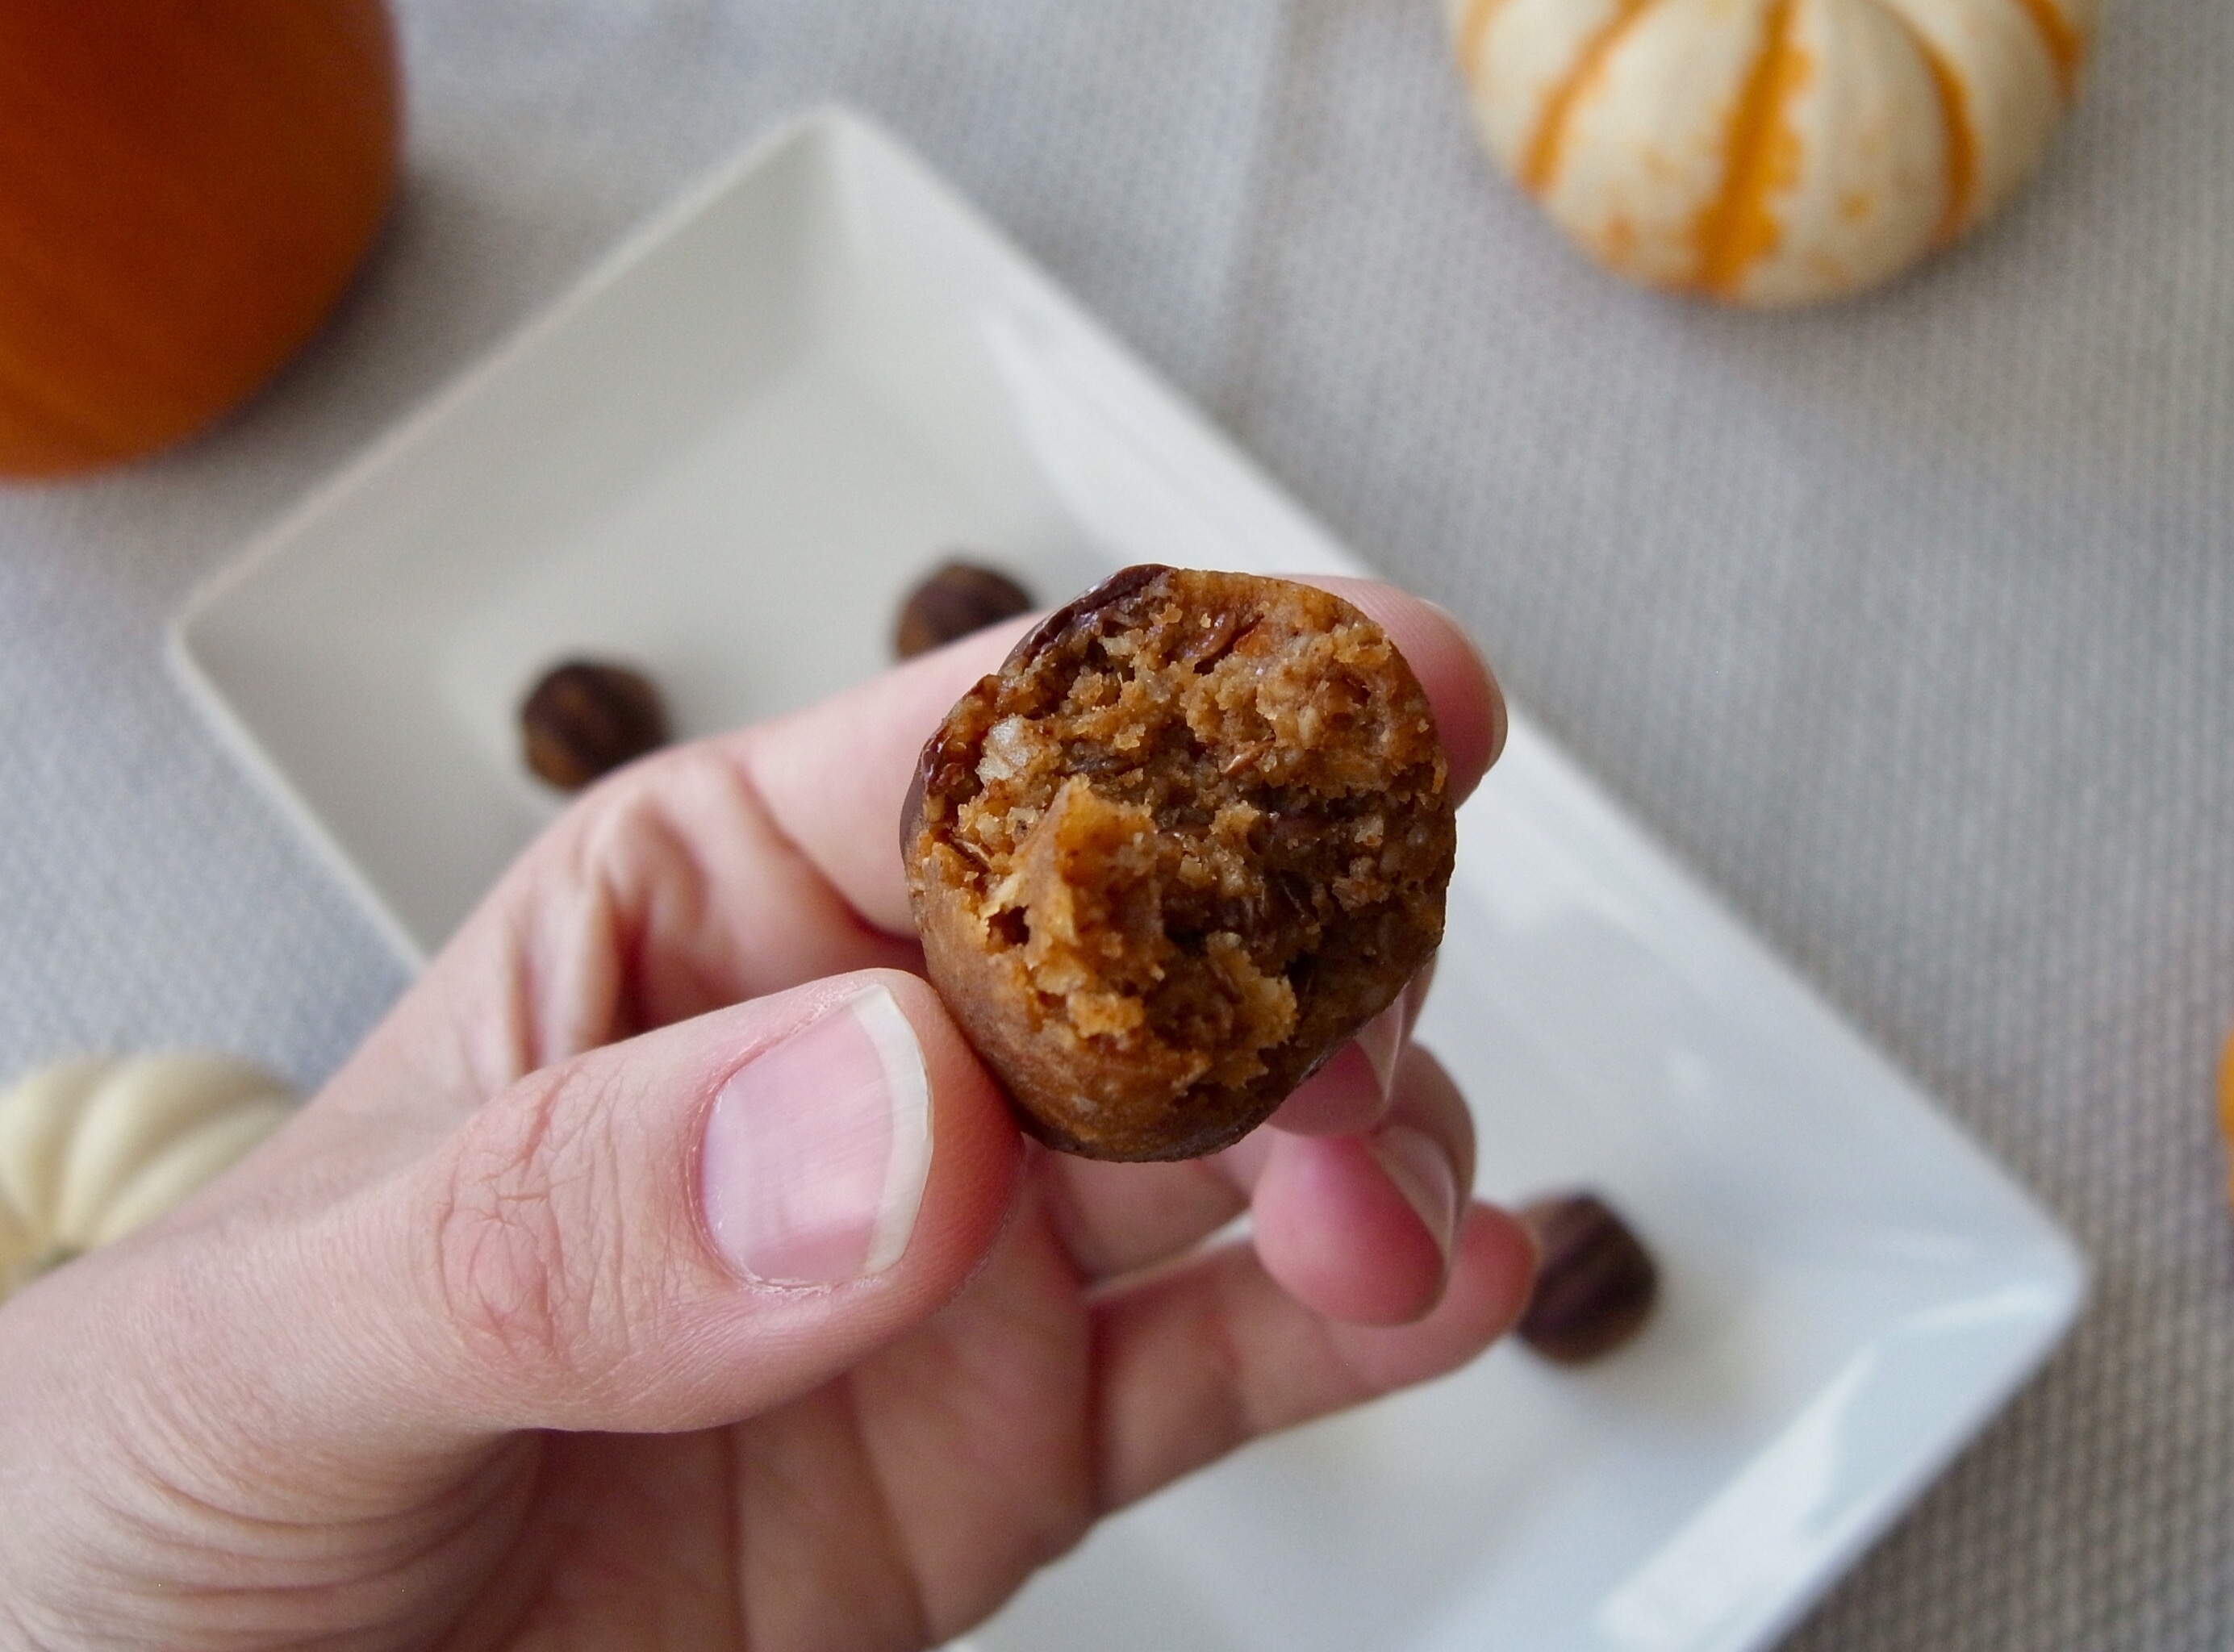
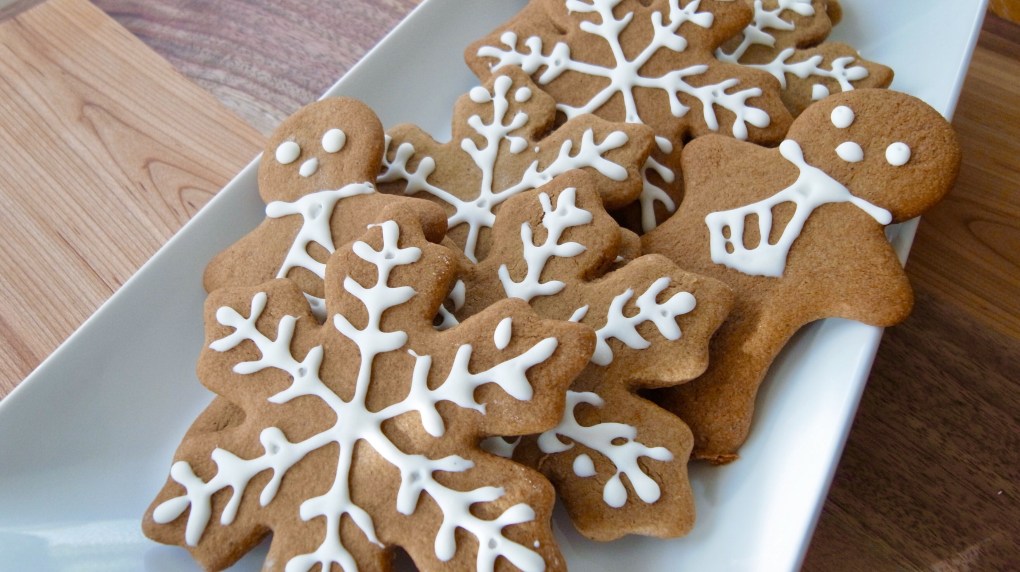
This second holiday cookie recipe is just as easy to make. I had a vision to use pumpkin in gingerbread to use up some that I had from baking all of my Halloween and Thanksgiving pumpkins. I found a Spiced Pumpkin Gingerbread recipe from Ella Claire and decided to do a couple of tweaks to make them a tad “healthier”.

Pumpkin Gingerbread Cookies

Makes ~2 dozen cookies

Ingredients

  • 1/2 c butter
  • 3/4 c sugar
  • 1/4 c molasses
  • 1/4 c pumpkin puree
  • 1 egg
  • 1 tsp. vanilla extract
  • 2 c all purpose flour
  • 3/4 c whole wheat flour
  • 2 tsp. baking soda
  • 1/2 tsp. salt
  • 2 tsp. cinnamon
  • 1 1/2 tsp. ginger
  • 3/4 tsp. cloves
  • 3/4 tsp. nutmeg

Directions

  1. With an electric mixer, beat together butter, sugar, and molasses. Add the pumpkin and mix well. Add the egg and vanilla.
  2. In a separate bowl, combine all of the rest of the dry ingredients. Slowly mix your dry ingredients into your butter mixture until combined.
  3. Wrap in wax or parchment paper and throw in the refrigerator for at least 3 or 4 hours until it firms up. Or overnight
  4. Preheat oven to 375 degrees. Lightly flour your work surface and split your dough into thirds. Lightly pat the top of one section of dough with flour and roll out until it is about 1/8″ thick. I tried 1/4″ thick and my first sheet of men turned out a bit to blobby.
  5. Cut into desired shapes and place on a parchment lined cookie sheet.
  6. Bake for 6 to 7 minutes at 375 degrees. Let cool completely.
  7. Pipe your favorite icing onto each of your cookies into desired design. I cheated and used a store bought Pillsbury cookie icing. I’ll admit I’m not an icing expert – about the best I can do is ganache and cream cheese frosting – neither requires hardening.

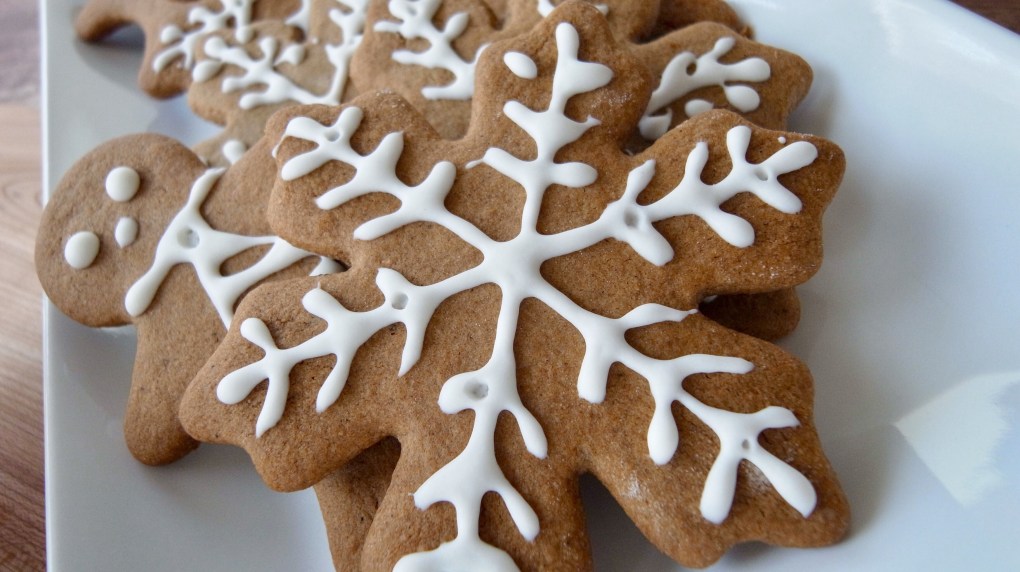
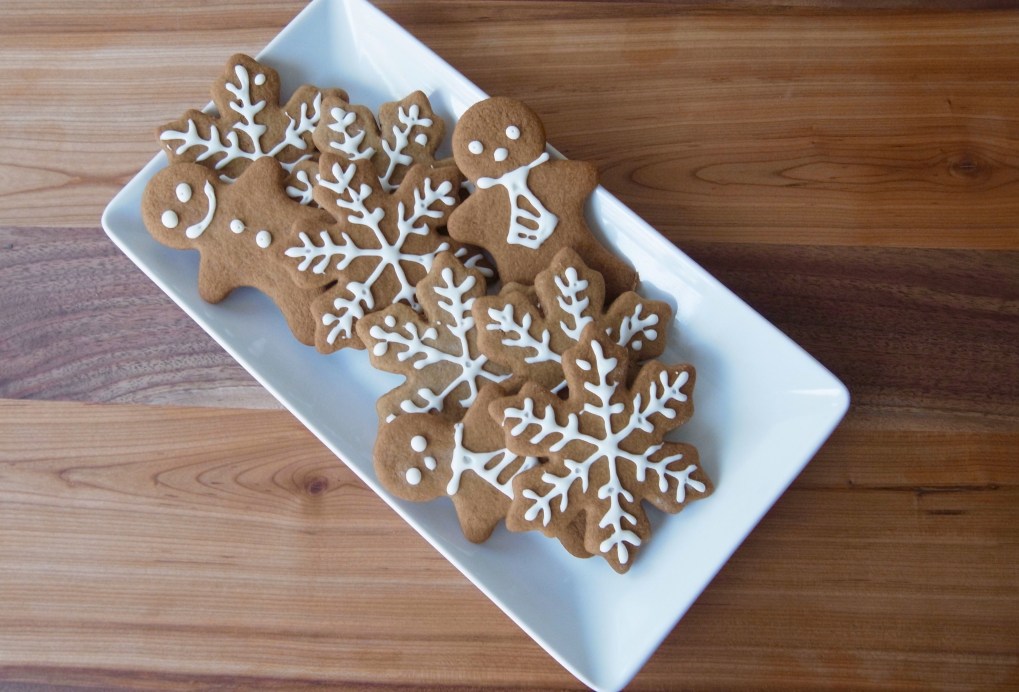
I think they turned out pretty good. I opted for the traditional gingerbread man and a snow flake design – and I’m really digging the snow flake!

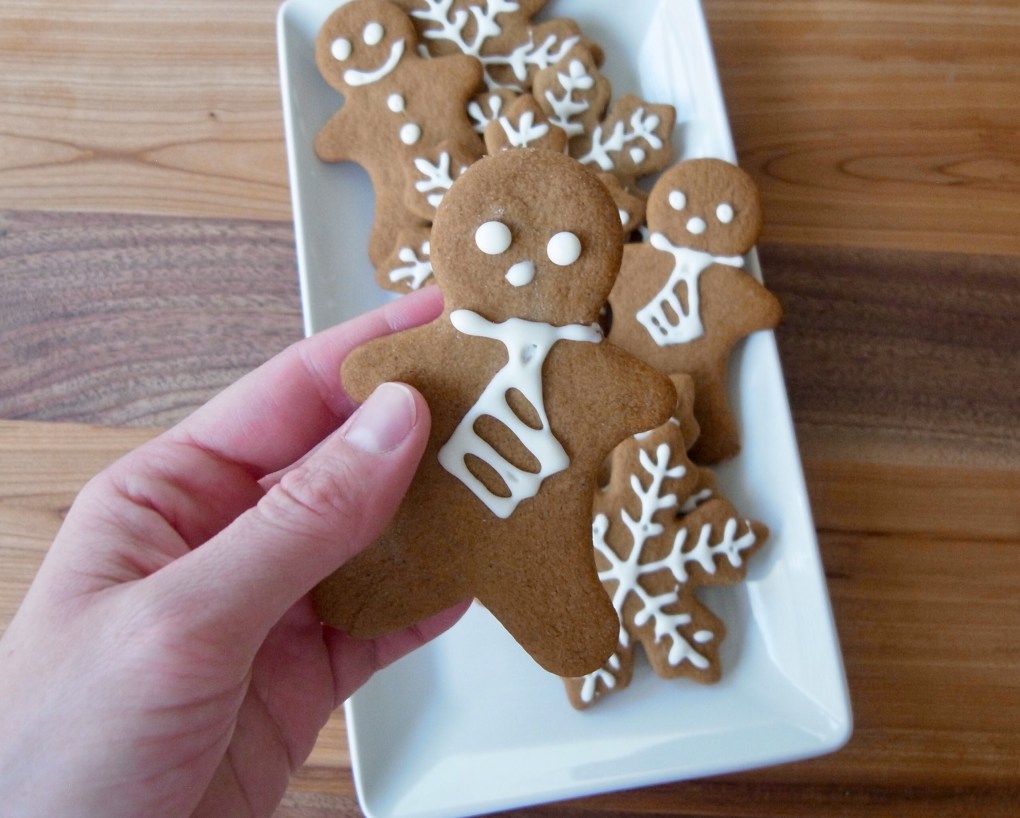
Who can resist a man in a suit? I certainly couldn’t.

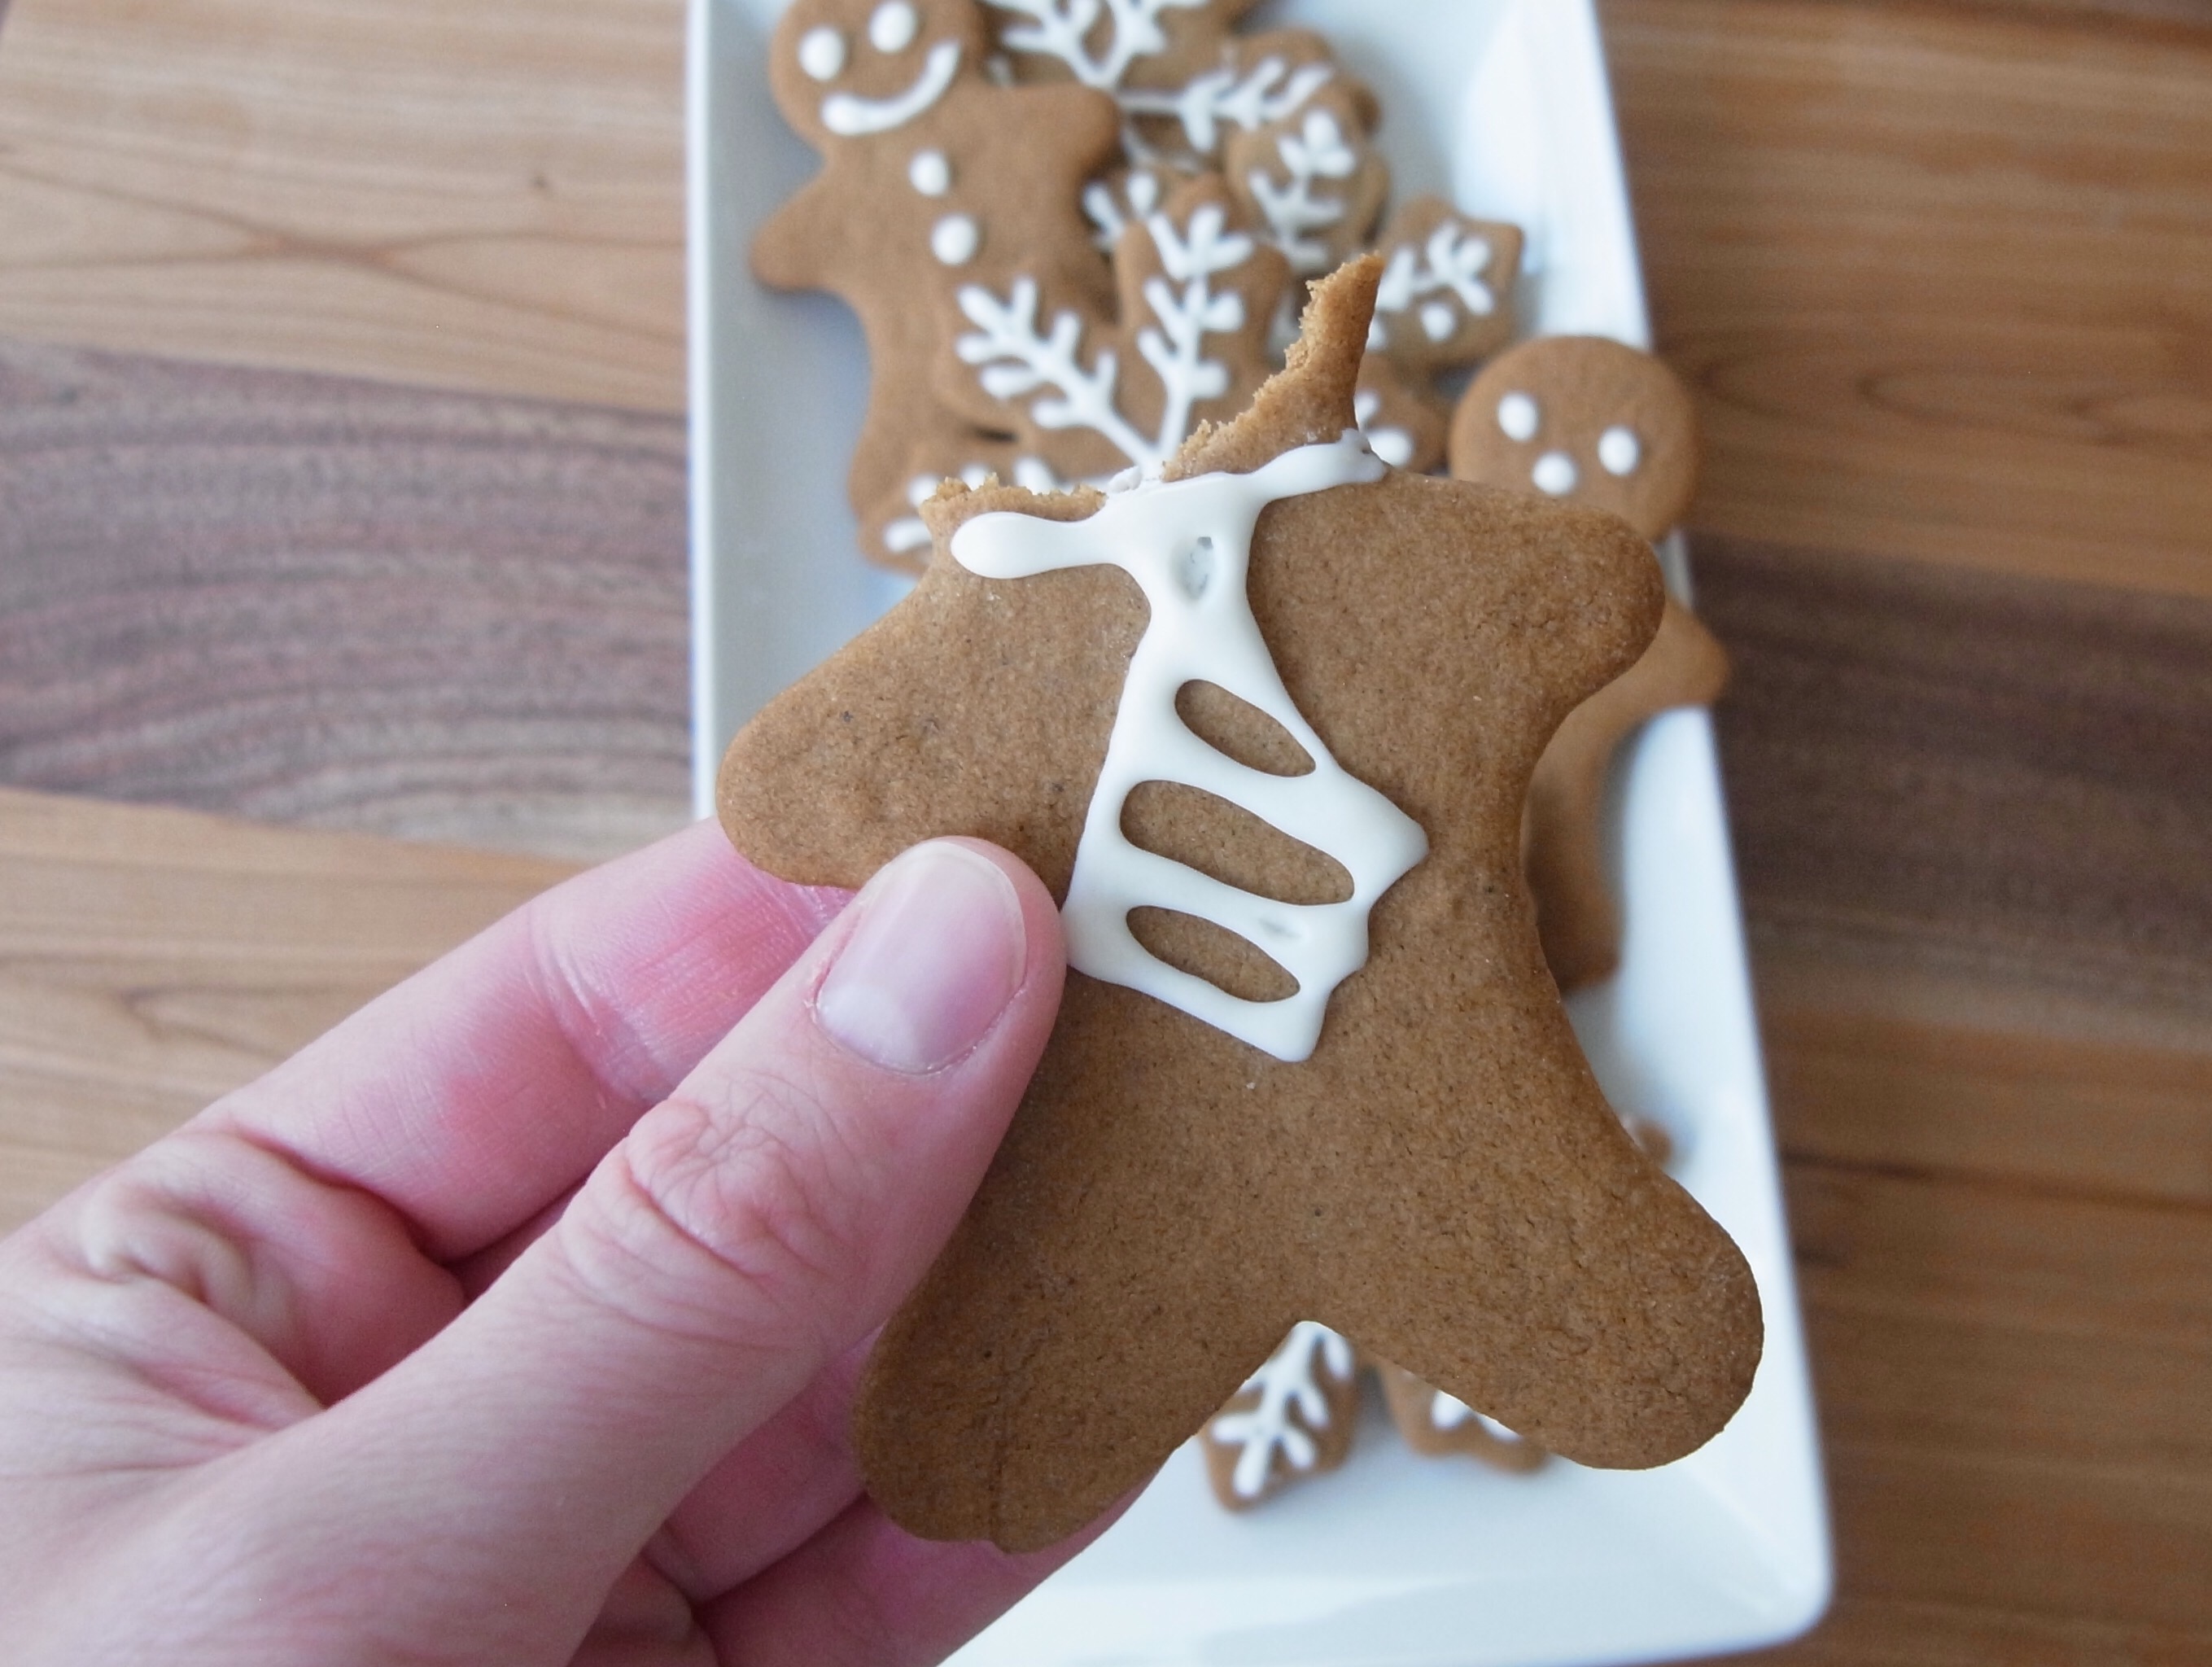
Completely yummy and now almost completely gone – I guess that means I just need to make more!

What are your favorite holiday cookies? Does anyone else have to hide the cookies in the freezer to keep the temptation off the counter?


Lefse (Lefsa)- My Favorite Scandinavian Heritage Food

I have been waiting for the perfect time to share this recipe and since the holidays are here, I’m SOOOO excited to bring this to the blog. Lesfe is a potato flat bread, but don’t even try to confuse this with a tortilla, naan, or a cracker – it’s like none of those. Since I’m 100% Scandinavian (Norwegian, Swedish, and Dutch) there are some holiday traditions I am determine to keep in the family. (For those readers not in the States and might find it weird that Americans classify themselves by where their ancestors came from – it’s just a way to hold on to family and still think of the home country – even if no one has lived their in 100 years.)

r0016725

Being away from my community of Norsk folk, I become nostalgic. Although homemade lefse is always just as delicious as I imagine. And because I’m a bit of a food snob (ok, a lot of a snob), the store bought, factory made is just not even close – usually way too thick and you can taste the preservatives. The real deals don’t stay but for a few days unless quickly frozen.

r0016425

So anyway, when I was home in Minnesota with my family for a week in July, I asked my Mom if we could make some lefse. 🙂 Luckily I could twist her arm into a batch or three.

When making proper lefse, you start with the potatoes. Half mealy such as a russet and half waxy like a red or yukon (might have some golden lefse). Make sure everything is peeled – this is something that the added fiber from the skins will not improve.

r0016706

After cooking, rice the potatoes. And yes, don’t just mash, they need to all be of the same consistency. Measure out 3 cups of the riced potatoes.

r0016709

Add in your butter, salt, sugar, and cream and let cool. Set in the fridge or outside (if the temp is cold enough but not in those -20F – that’s quick freezing and we won’t need that).

When you’re ready to start making the lefse, stir in the flour and portion into 1/4 cup balls – you should get about 13-15 balls in one batch.

r0016714

I want to talk real quick about the equipment needed for lefse – because it’s very specific. You need your pastry board, rolling pin covers/sockswaffled rolling pin, lefse turning stick (trust me, this is magic), and your lefse grill (this is not a pancake griddle and is different that a crepe grill, it’s a lefse grill- you can see the very thin concentric rings).

r0016711

For people just starting out, here’s a great starter kit, minus the waffled rolling pin – but it does come with the rolling pin sock/cover which my Mom says is really important!

r0016715

Store the dough you’re not using in the fridge if you’re making multiple batches. Then take and roll out the dough, flipping occasionally until it is about 1/16-1/8 of an inch thick. Using your stick, transfer over to the hot grill and lay flat.

r0016716

If you’re getting any bubbles, just tap the bubble to release the air. Once you see some dark brown spots starting to form on one side, flip it over to the next. If you’re a real pro at this or have a helper, you can have one person rolling while the other watches the grill. And then have two grills!

After removing from the grill, it’s easy to stack them to keep them warm and from drying out. Cover with a towel between additions.

r0016724

And I can’t forget the most important step… eating! Now although I saw it on a menu at Cafe Broder in Portland, IMHO fish does not belong in or on lefse. Although it may be used like bread or a tortilla, I feel that lefse is not a device for a sandwich. My family puts butter and sugar/honey on theirs and eats it tightly rolled.

r0016426

Lefse (My Mom’s carefully honed recipe)

Makes about 13-15 lefse (I recommend you make for double or triple the recipe)

Ingredients

  • 3 c potatoes, boiled & riced (use half waxy and half mealy potatoes)
  • 4 T butter
  • 1/2 tsp salt
  • 1 T sugar
  • 1/2 c cream
  • 1 1/2 c flour

Directions

  1. Peal and boil potatoes – for three cups you should be safe with 4-5 large potatoes.
  2. Rice potatoes and measure out three cups.
  3. Add butter while hot.
  4. Add the salt, sugar, and cream; cool in refrigerator. If you double the batch, leave in refrigerator overnight.
  5. When ready to roll, mix in the 1 1/2 cups of flour per 3 cups or riced potato mix.
  6. Measure out 1/4 cup mix for each lefse and roll thin.
  7. Bake on a 450F lefse grill. Turning when dark brown spots appear.
  8. Store lefse for 1-2 days in an airtight container or layer and freeze.

For the finished product photos, I have to give credit to my Mom and Dad. In July I completely forgot to get a finished product shot – I was too excited to eat them. When talking to my parents yesterday, my Dad said they were making lefse this weekend so I begged them to style a few shots for me. And I think they turned out fantastic! They’ll be instagraming and styling the rest of their food soon I’m sure. 😉

r0016423

What are some of your holiday food traditions?


Portland 2016

The weekend before Thanksgiving, C and I traipsed around Portland. And I’m now just finally getting to writing a bit of a recap. Spoiler – it was fantastic! And I can’t believe I was considering not going. C was there for work and I decided to tag along for the heck of it and to take a much needed mental break from the everyday.

We arrived on a Friday afternoon and after dropping suitcases off at our hotel decided to hit up the Deschutes Brewery first. I did a sampling since I had absolutely no idea what to get. I would say I liked 3/4 of them or would consider drinking a full pint.

For dinner we went to Higgins – which I highly recommend to any foodie. You can also grab a place in the bar too if you’d like but we got super lucky with the final open reservation for the evening. We had an onion tart (which I noted was made the same way I make scalloped potatoes – just onions and cream), then for an entree I had the halibut with potatoes, brussels, and Jerusalem artichokes over a cauliflower puree with bacon – super tasty and delicious. We were too full for dessert, but I bet that would have been good too.

We ended our evening with drinks at The Green Room which is below the Multomah Whiskey Library which C would have loved to go to but their was an hour wait and we were exhausted.

Waking up the next morning I found we had a pretty nice rive towards the river.

For brunch we headed out to the next place on my list – Broder Nord. It’s a Scandinavian cafe, how could I not go? And although I was completely starved by the time we arrived (1 hour behind and I’m cranky I didn’t get breakfast an hour earlier), I believe I did a good job with control. 😉

A must eat on my list was the Abelskivers – so perfect with the lemon curd and lingonberry.

For my main meal I ordered the oven baked omelet with red onions and sausage. And THEN for my side, I had to order the lefse with butter and honey on the side. (The main lefse for the day was filled with smoked salmon – sacrilege in my book.) I’ve been raised on lefse for 30 years and you definitely do not put fish in it. I’ve also never seen it fried or reheated to crispy with butter or oil on a griddle, but it wasn’t bad. Perhaps a tad oily, but overall enjoyable even if it doesn’t hold to original or homemade standards. I’m a lefse snob, get over it.


Saturday evening we had dinner at the Raven and Rose. We had warm winter drinks in the Rookery Bar above before dinner – which is a definite recommendation a if you’re looking for someplace cozy. They even had Netflix on – we watched Burn After Reading for our pre-dinner entertainment.

Since we were already content with our pre dinner snacking, we jumped right to entrees. I chose the chicken breast – it was good but not about to blow me away or anything I likely couldn’t replicate at home.

Sunday brunch we headed out to The Screen Door. If you go, I recommend getting in line early. We arrived right at 9am and ended up waiting about 45 minutes. But it was definitely worth it.

Right next door to The Screen Door (excellent business strategy I might add) we got coffee and tea and Kopi Coffee. I got a Chai latte with almond milk and loved the traditional spice (not the watered down Americanized version at all).

Once we finally got in to brunch, we shared two apple turnovers.

And I ordered the cheesy grits with vegetables! I also asked for a poached egg on top for some extra protein. If I could live in this bowl I think I maybe would.

Sunday afternoon I went to a yoga class at Yoga on Yamhill. Even though I teach yoga, I find it refreshing and renewing whenever I can be a student. It was a good class led by the owner of the studio and was pretty packed – I usually take that as a good sign. The only aspect I would have changed is to use more pose names rather than just descriptions of what we were supposed to be doing. As a new person I didn’t always catch on to how I was supposed to be positioned when it only learning method used was auditory and very little visual.

After yoga I made my way over to VooDoo Donut to pick up a last treat for the weekend. I got four – because I definitely intended to share (almost all of it). The maple was for C, we shared a cream filled and a banana peanut butter chocolate fritter, and then the French Cruller was all for me.

The French Cruller is probably my favorite donut ever since I was a kid. I love the eggy holey inside and although it’s a treat, you don’t feel overly stuffed after eating.

On our final evening together in Portland, we hit up Andina which is a really great Peruvian restaurant. Although I still think the original is far superb, this brought back some great memories with the Pisco and empanadas.

By this time it was pouring rain, so we ran over to Rogue Alehouse until it let up. I tried a flight of their ciders and sours. Pretty good, with only one being way too sweet for my taste – I like tart cider and sours rather than sweet.

Portland was a food dream. And although food is really all I mentioned, we did go to the Art Museum, the Museum of Science and Industry, and explored the Saturday Market. The thing I like to do best in any city is just try to get lost of a little while in its streets – and Portland is definitely someplace you can feel the culture and history in the midst of new buildings or revamped construction popping up all over the place.

I’d visit again.

What are your favorite things to do in a new city? What are some ways that you get lost in a city or explore to its fullest potential? 


Fall Kale Butternut Squash and Pear Salad with a Cider Viniagrette 

We’re now past Halloween but I’m still in the pumpkin mood. I loved this display at the Sprouts a couple weeks back. I even pick up a few for the front door – obviously they were the edible kind. And because Halloween is past I’m thinking of baking up a few of my pumpkins  – hopefully I’ll get a couple new recipes.

I dreamt of this salad when I was trying to figure out something else to do with a kale salad that wasn’t savory. Then it hit me – squash doesn’t need to be savory (although sage and squash is pretty tasty). And wanting another more tender alternative to apple, I turned to the pear. If you’re looking for a fresh bite of fall, this definitely hits the spot and you can do it warm too.

Notable Nutrition – Kale/dark green and squash. Both have fantastic vitamin A. So this salad is a treasure trove of that all too important for hair, skin, and nail nutrient.

Kale, Butternut Squash and Pear Salad

Serves 4 large salads

Ingredients

  • 1 bunch of curly kale, chopped fine
  • 1 butternut squash
  • 2 Bartlett pears, diced
  • 1/2 c dried cranberries
  • 1/3 c chopped, toasted walnuts

Apple Cider Vinaigrette

  • 3 T apple cider vinegar
  • 1 T honey or maple syrup
  • 1 tsp dijon mustard
  • 1/4 tsp cinnamon
  • Dash of nutmeg
  • 1/2 c olive oil

Directions

  1. Peel, de-seed, and cube butternut squash (dice size). Drizzle olive oil on a baking sheet and roast squash at 375F for 30 minutes or until soft and can be pierced with a fork.
  2. In a mason jar, mix the vinaigrette ingredients and shake to combine.
  3. In a large bowl toss together the finely chopped kale, pears, squash, and cranberries.
  4. Plate the salad, sprinkle with walnuts (divided between plates), and drizzle with vinaigrette.

In other news, at the beginning of November C and I celebrated our 4-year anniversary. It’s been a good few years – lots of travel and adventure (one of the things we both like best to do with each other), growth as people (me, I’ve definitely grown to accept that someone else can help take care of me sometimes), learning each others quirks, and finding how to best compliment each other. I don’t think complete would be the right word because we were both very whole people when we met (and wouldn’t have worked if we weren’t) – very individualistic. And one of the things I still really value is our ability to remain individuals and know that we don’t need to have the same hobbies and activities.

Although I will always contest that we make our own decisions and that you can rebel against fate, I do have to believe some people were meant to come into your life for some purpose or period of time. Throughout my life I’ve met some people that upon a closer look have nearly met at different times (usually at opposite sides of the country). C happens to be one of those people where the 4th time was the charm. In chronological order – both had plans/dreams of doing undergrad at Johns Hopkins 04/05(we both made other decisions), we both almost moved to Boston in 08/09 (again life took us other places), while life took me to UIUC – it also took one of C’s good friends there for grad school where C happened visit and be at an event I distinctly remember running past one Saturday (but I didn’t stop that day), and finally life took us both to Albuquerque. I think life is funny sometimes.

Have you ever had any weird “should have met” coincidences?

One of our next adventures will be to Portland. Any advice on places to eat?


Pumpkin Pie Energy Bites

It is finally pumpkin spice season, although if you ask me that is any time of year. I do pumpkin all year long, it’s so great for vitamin A. But since the rest of the country/northern hemisphere does pumpkin in fall – September/October is the acceptable time to roll out the pumpkin spice. 

I’ve been looking for a festive option for my energy bites and after a few trials – I really find most of the date versions of energy bites too sweet (and maybe I’d dated out), I arrived at these. I also added a chocolate drizzle. You can have them with chocolate or without – but if you haven’t tried pumpkin and chocolate together I’d recommend trying it at least once. 

I also caved and paid for pumpkins – I’ve grown up with pumpkins for free because my parents raise and sell them but since I now live thousands of miles away, I can’t get a shipment for free. 😦

Pumpkin Pie Energy Bites

Makes 20… I just make them about quarter diameter?

Ingredients

  • 1/2 c rolled oats
  • 1/2 c pecans
  • 1 T flax seed
  • 3-4 T maple syrup
  • 1-2 tsp pumpkin spice
  • 1/4 c + 1 T almond butter
  • 3 T pumpkin puree
  • 1 tsp vanila

Drizzle (optional)

  • 1/3 c dark chocolate chips
  • 1 T coconut oil

Directions

  1. Put oats, flax seed, and pecans in a food processor and pulse until ground into a fine crumb. Add vanilla and pie spice and pulse to combine. (Can add flax in the second addition with with spice and vanilla if a more whole form is desired). 
  2. Add in pumpkin and  almond butter. Pulse to combine – pushing down when necessary. 
  3. Lastly gradually add maple syrup to make cohesive “dough”.
  4. Roll dough into small bite size balls and slide into fridge to store or hold shape. 
  5. If using the chocolate drizzle, heat chocolate chips and coconut oil in a microwave safe bowl for 30 seconds, stir to combine and repeat heating and stirring until fully melted together and smooth. 
  6. Drizzle chocolate over balls or dip bites directly into chocolate – return to fridge to harden. 

Eat and enjoy! They are such a great option for handling those holiday flavor cravings. 

While testing this recipe I tried a version for a work client without the pecans, and I definitely like it better with pecans since pecans and pumpkin just go so well together.  I also prefer the almond butter to peanut butter since peanut butter has such an powerful flavor in my opinion – delicious, but not sure I’m ready to mix my peanut butter and pumpkin just yet. 

What are some of your favorite fall flavors? Pumpkin reminds me of home. Do you find yourself craving more comfort foods and the weather cools? 


Spinach Mushroom Bacon Strata

It’s been a month… or almost two since I posted a recipe – how did that happen?! Well, I’ll ramble about exactly how that happened in a moment, but for those who only care about the recipe and food – we’ll talk about that first. 🙂

Obviously breakfast is my favorite meal of the day – maybe this blog should have been all about breakfast, but I’m pretty sure someone already claimed that… And finding new brunch type recipes that can easily traverse into lunch or dinner is a win in my book. Strata can do just that.

For this strata I was inspired by some day old baguette. I bought the “wheat” kind but from the photos it honestly doesn’t appear that way – I swear I did. For whatever reason I always picture mushrooms in strata and so an idea was born. Mushroom, spinach (obviously), bacon (for C), and then for the cheese I chose some Monterey Jack. One thing to remember especially when making a strata and not a straight up egg bake is that for the egg mixture to soak into the bread you’ll need at least 8 hours or up to a day in the refrigerator.

Spinach Mushroom Bacon Strata

Serves 8 generously – have a side salad too

Ingredients

  • 2 T olive oil
  • 1 white onion, diced
  • 8 oz baby bella mushrooms, cleaned and sliced
  • 3 c tightly packed baby spinach, roughly chopped
  • 6-8 c cubed bread (I used a French baguette 2″x18″ loaf, but feel free to adjust based on how bready you like your strata)
  • 2 c Monterey Jack cheese, shredded
  • 7 large eggs
  • 2 c milk
  • 4 strips of peppery bacon
  • ½ teaspoon salt
  • ¼ teaspoon pepper

Directions

  1. Heat olive oil over medium heat.
  2. Add onion and cook until soft. Transfer to large bowl with bread cubes. 
  3. In the hot pan, add the mushrooms and cook until mushrooms begin to release moisture.
  4. Add spinach and toss until wilted. Remove from heat.
  5. Add mushroom/spinach mixture to bread, tossing to combine. 
  6. Wipe out pan and return to heat. Cook bacon in pan until crispy and transfer to plate with paper towels to cool. When cool enough to handle, chop or crumble bacon into small pieces and add to bread mixture. 
  7. Lastly add in shredded cheese and fold to combine. 
  8. In medium bowl, whisk together eggs, then add milk and seasonings. 
  9. Pour egg mixture over  bread mixture in the large bowl and mix to combine. Transfer mixture to greased 9″x13″ glass baking dish.
  10. Refrigerate mixture for 8 hours, or up to overnight, covered.
  11. Preheat oven to 325 degrees F.
  12. Bake, uncovered, for 55-65 minutes, until golden brown and cooked through. Middle should be set and not jiggle or knife inserted into center comes out clean. 

Just the perfect brunch or weekend lunch. 🙂

Ok, so why the long break? Being entirely honest – I have felt completely uninspired and blah this whole past month. Most of it stems from my day job – I’ve been overrun and it’s hard to see the end in sight. For weeks at a time I’ve come home completely exhausted without an ambition to make food (thank goodness for C!), let alone formulate something to eat for dinner. No joke if C wasn’t here I’d probably be living on cereal and completely protein deficient. While I love what I do (or at least the idea of it), I don’t particularly care for it when it interrupts my personal life, wiggling its way into my evenings, weekends, and even morning workout time. When I don’t get time for my passions I tend to get a little cranky and blunt.

I’ve had some inspiration the past few days, so I’m going to see where it leads. I’m out of the office most of the month of October and hopefully not being in a dreaded cube will help (seriously soul sucking). Fall is my favorite season (perhaps a bit basic but whatever) and having grown up with pumpkins I do have a few new recipes to share celebrating autumn and harvest time.

How have you made it though those uninspired months? What do you do to ensure work-life balance?


Roasted Peach and Blackberry Salad

Is anyone else sad that summer is almost over? I know, technically not until later September, but Labor Day really signifies the end for many of us. While I absolutely love cool evenings and signs that fall is coming, I still miss the carefree feeling of summer. Sweaters are my favorite type of clothing, but I would wear shorts year round if I could (with a sweater though – shorts and sweaters are fine together right?). Oh, and I can’t forget about boots either! Maybe I am ready for fall?


But before we jump too quickly into fall, lets talk about the fresh produce – the end of summer usually means stone fruits and I am beyond excited that peaches are finally ripe on the tree. We trimmed back our peach tree a lot this year and only got four extra large peaches but if you can find some at a farmer’s market they typically taste just as good.

I was dreaming of this salad after seeing it on a menu a couple weeks ago – roasted peaches, blackberries, and a local feta. Since I didn’t order it that evening I wanted to see what I could come up with myself.

I would say that it turned out pretty good! I added some pomegranate seeds for an extra pop of color and crunch in addition to the pumpkin seeds. And naturally arugula because I just love spicy greens or at least those with more flavor!

Roasted Peach and Blackberry Salad

Serves 4 large or 6 medium salads (and is easily scaled!)

Ingredients

  • 3 medium-to-large peaches
  • 2-3 cups of blackberries
  • 1 pomegranate, seeded or ~1 cup of seeds
  • 1/3 cup pepitas (pumpkin seeds)
  • 8 oz feta cheese
  • 8 cups arugula or other spring mix
  • Your favorite vinegar for dressing

Directions

  1. Prepare two large sheet pans with parchment paper and preheat oven to 425F (option to use broiler at 500F too – but watch carefully).
  2. Wash and dry all produce. Cut peaches into slices and arrange on one baking sheet. Evenly distribute blackberries on the other.
  3. Roast peaches and blackberries in the oven for 10-15 minutes at 425F or until tender and slightly “toasted”. If you choose to broil, this will be closer to 5-7 minutes. (Roasting on the grill is also a great summer option!).
  4. While fruit is roasting, arrange greens on plates or in a large bowl.
  5. Remove fruit from oven and let cool slightly.
  6. To arrange the salad, layer peaches first, then blackberries, feta, pomegranate seeds, and pepitas.
  7. Drizzle with your favorite vinegar or dressing. I personally love just a 18 year thick aged balsamic.

Time to eat!

This is a great salad served with salmon or other heartier fish. Since I’m a bread-aholic, I would also accompany this with a biscuit, light scone, or toast. You could take this for lunch by mixing the toppings together in one container and then topping the greens once your ready to eat. If you mix the arugula with everything and have it sit too long, the arugula will not be the freshest.

What are your favorite end of summer fruits and vegetables? Are you looking forward to fall or mourning summer? 


Peanut Butter and Chocolate Hazelnut Dips

Most dietitians love grocery shopping and I am definitely in that majority. While I do write a list and stick to it the best I can, so of my favorite food shopping experiences are when I don’t really have an agenda or major meal plans and I get to find inspiration. I was at Sprouts a few weeks back and Justin’s Chocolate Hazelnut Butter was on sale. And while I’m usually a plain old all natural peanut butter sort of gal, it was an impulse buy I couldn’t refuse. And I’m glad I didn’t!

While the chocolate and hazelnut spreads are good, maybe I had just a bit too much traveling around Greece (because we couldn’t buy PB) and perhaps a few of those pounds were from all of the delicious Nutella. If it was just a few weeks vacation it may have been no big deal, but alas it was a full semester. Now, I typically like to “make” something with my chocolate and hazelnut spread. I’ve also found Justin’s to be slightly less sweet.

If you’re looking for a chocolate vegan cream pie, chances are you’ll stumble on a tofu pie. And while I love pie, I like the freedom to dunk and dip whatever I’d like into that delicious, fluffy, goodness. (Oh, BTW, my dad made me this awesome board – it’s made of cherry and black walnut. He made me another too with oak and black walnut. From trees taken off my grandparents’ properties. Aren’t they beautiful! I wanted a large serving board and he sure delivered.)

It’s pretty much that simple, just tofu and your favorite nut butter.

And since it’s tofu, it’s packed with even more protein… although I wouldn’t call it low fat, it definitely satisfies hunger.

Peanut Butter and Chocolate Hazelnut Dips

Makes about 4 cups all total

Ingredients

  • 16oz firm to medium firm tofu (I think the firm has a richer texture but you can change to your preference)
  • 2/3 c all natural peanut butter
  • 2/3 c Justin’s Chocolate Hazelnut Spread
  • 2 T soy milk (or other milk alternative)
  • 2 tsp vanilla
  • 2 T sugar (if needed)
  • Your favorite fruits for dipping

Directions

  1. Drain tofu and divide into two 8oz blocks.
  2. Cut first block into smaller chunks and put in food processor.
  3. Add the peanut butter and half of the soy milk, sugar, and vanilla. Puree until very smooth. Depending on consistency, you may need to add a touch more soy milk.
  4. Scrape peanut butter dip into a bowl or storage container.
  5. Moving on to the chocolate – cut the second 8oz tofu chunk into smaller chunks and put in food processor.
  6. Add the chocolate hazelnut spread and second half of remaining sugar, soy milk, and vanilla. Puree until smooth and scrape into second bowl.
  7. Serve with fruit and/or graham crackers.

It’s the richness of a tofu pie in a smaller portion! I love my peanut butter with bananas, apples, and grahams.

The chocolate hazelnut goes great with strawberries. Holy yum.

It didn’t add too much sugar because I already really like tofu and tend to prefer my nut butters on the saltier side. I also can’t taste certain bitter compounds (weird FYI about myself) – so if you do find it somewhat bitter, feel free to add a touch more sweetener.

Is that not the best snack spread or what?!  After school or after work snack, whatever floats your boat. Does anyone else treat work and school nights the same?

What are some of your favorite snacks? Do you ever find yourself wishes that your favorite deserts could be made in mini/portion controlled forms?