Not The Perfect Yogi

IMG_0848

I’ve been teaching yoga for over 3 years and practiced (sometimes intermittently) for 7 years. And for whatever reason within the last year I’ve had thoughts of shame creeping up on me that I wasn’t setting a guiding example for my students – I wasn’t the perfect yogi. I’d compare myself against other teachers in the area and of course the perfect forms you see on Instagram. I would see myself as lacking because I wasn’t doing the handstands or wasn’t (and probably will never be) the most flexible. But yoga is and should be about YOUR PRACTICE and what it means to you. It shouldn’t and doesn’t matter what’s on the outside and how poised you appear to others – it’s about how it makes you feel and the changes happening on the inside.

So I’ve decided to say, f*ck it, I’m human, I love yoga, and I’m going to embrace me. And hopefully that true light will attract other like minded individuals.

10 Ways I’m not the perfect Yogi

…and I’m ok with that.

  1. I don’t do yoga for hours a day or even 20 minutes all days.
  2. My flexibility has and always will be a work in progress.
  3. I’m not vegan or vegetarian. Although I gravitate towards more plant based options, I know that sometimes I like a piece of chicken or pulled pork.
  4. I don’t only eat organic – because sometimes it’s a waste of money. Seriously, organic sugar substitute? Just eat the sugar. Eat whole foods and limit the processed crap.
  5. I don’t always have positive thoughts about people.
  6. I’m afraid of handstands and going upside down, but I’m working on it.
  7. I like wine & yoga classes – they’re fantastic, and let’s be honest, no one is there for the full on yoga experience. So let’s just stop discussing how it’s not true yoga because alcohol won’t help your center or your breath.
  8. I love doing yoga to jazz, pop, and club dance music. Flowing to a beat.
  9. I’m not 11% body fat and never will be again – mainly because that was a very, very unhealthy time for my body. (FYI – that percentage is low for women).
  10. I don’t meditate daily or sometimes even weekly, but it is one of my goals – someday, eventually.

Bottom line. Be who you are. Don’t try to fit a certain mold or stereotype – you end up a poor imitation and feel awful in the process.

IMG_2161

I try to keep my own practice and my classes true to who I am and how the body feels in that place and time – sometimes I completely throw out what I initially set out for my class because moving into this feels better than moving into that in the moment.

Shame can be a natural/normal feeling that creeps into various parts of our life and can in some cases take years to work through. Especially when we’re bombarded with the picture perfect images on Facebook, Instagram, and even blogs! The most important piece to remember is photos are staged and all we’re seeing is the highlight reel. The moments in between the highlights are where real (not reel) life happens and that is just as beautiful (mess, pain, work, and all).

Namaste y’all.

Peace and lots of love,

Ingrid


Everyday Arugula Salad

I recently made this salad for a small wedding reception we held at our home. I was looking for something light yet super tasty at the same time and satisfied the need for something green with all the smoked meats we had. And since the party, I’ve been wanting to eat this every day! It goes with basically every meal, IMHO.

I also neglected to get any pictures of the party or food set-up! Who am I? Maybe it’s just me trying to live in the moment more? Or for a more positive spin, I was just too involved in the people who were there to think about taking pictures – although they would have been nice to have after the fact.

At least I remade one of the salads to capture these shots! And did remake the Raspberry and Whipped Hazelnut Tart for a couple of the desserts. 🙂

R0017119

This type of lightly dressed tangy greens reminds me of the salads we ate in France with just about every meal. It’s a great way to eat your greens and get all of the nutrients they provide without needing to be dosed in Ranch or smothered in so many additional toppings the healthiness becomes obsolete.

Everyday Arugula Salad

Serves 1 or a whole table

Ingredients – in no particular quantities

  • Arugula
  • Marcona almonds
  • Golden raisins
  • Shaved parmesan cheese

Vinaigrette

  • 3 T Olive oil
  • 1 T Lemon juice
  • 1/2 -1 tsp Dijon mustard
  • Salt and pepper to taste

Directions

  1. Place desired amount of arugula in a bowl.
  2. Sprinkle with almonds, raisins, and cheese. (If making a bowl for one, measure about 1 T of each topping – maybe double the nuts.)
  3. Measure vinaigrette ingredients into a mason jar, seal lid, and shake to combine.
  4. Lightly drizzle desired amount of dressing onto salad and toss to combine. Leaves should be very, very lightly dressed.

R0017122

Sometimes simple is just better.


Raspberry and Whipped Hazelnut Tart

Has anyone been watching the Great British Baking Show or the Great British Bake Off if you’re from the UK? I know we’re sort of behind on the times, but Netflix just released their first season of it last year (which was actually season/series 4?) and now they’ve added 2 & 3 (or 5 &6).  C and I did some binge watching and after finishing what Netflix had, sort of freaked out that there were three seasons prior to what we’d seen and had to get them to watch. Well…. to wrap things up, if you haven’t seen it, watch it now. And their opening cake was somewhat of an inspiration for the flavors of this tart.

A couple weeks ago I made hazelnut butter. And while it was really delicious on it’s own on toast, etc. I thought, what if it was a pie or fake-ish cheesecake? And Ta-Da! Idea born.

While the filling was a no-brainer for me with the tofu – since the same style works so well with peanut butter dip, I had a more difficult time trying to decide whether to do a fully “raw” tart (which you could totally do with this crust) or something more like a short crust pastry tart. I opted to go with the short crust pastry type and used inspiration from Sally’s Baking Addiction to make a pretty standard nutty pastry crust.

Raspberry and Whipped Hazelnut Tart

Serves 12-16

Ingredients

Toasted Hazelnut Crust

  • 3/4 c raw hazelnuts
  • 1 c all-purpose flour (or flour of choice)
  • 2 T sugar
  • 1/2 tsp salt
  • 1/2 c butter, cold and cubed
  • 3 T ice water

Whipped Hazelnut Filling

  • 1 ½ c creamy hazelnut butter
  • 14 oz firm tofu (1 package)
  • 3 T sugar or to taste
  • 1 tsp vanilla
  • pinch salt
  • 3-4 T vanilla soy milk (or other milk of choice)

Raspberry Sauce

  • 1 c organic raspberry jam
  • 2 T water
  • 1 c fresh raspberries

Directions

  1. If making your own hazelnut butter, I suggest you do that first before moving on to the rest of the recipe. Store bought is also fine, but difficult to find, and homemade is just that much better!
  2. Preheat the oven to 350°F. Spread hazelnuts out onto a foil or parchment lined baking sheet. Toast until slightly darkened, about 7 minutes. Watch these like a hawk! Allow to cool down for 5 minutes. Leave oven on to bake the crust.
  3. To remove the skins of the hazelnuts (they’re kind of bitter), lay a clean tea towel on your counter, and scoop the hot hazelnuts, into a pile in the center of the towel (take care due to the high heat of the nuts). Bring the four corners of the tea towel together and gather it up in one hand, so that all of your hazelnuts are scooped up in the bottom of the tea towel. Using your other hand, squish the bottom and the sides of the tea towel so that all the hazelnuts are rubbing up against each other. Do this for a couple minutes until most of the skins are removed.
  4. Separate out the skins from the nuts. I use a slotted serving spoon – it’s big enough to get more than a few nuts at a time and the holes are small enough that the nuts won’t fall through but the skins will.
  5. For the crust:Using a food processor, pulse the toasted hazelnuts, the flour, sugar, and salt together until it reaches the consistency of coarse meal. Add the cubes of cold butter and pulse until the mixture turns into pea-sized crumbs. I used frozen butter since I was working in a warm kitchen – you don’t want it to get too soft.
  6. Transfer mixture to a large bowl. Using a rubber spatula or wooden spoon, slowly stir in 3 Tablespoons of ice water. You only want to add enough water to bring the dough somewhat together. Using floured fingers or the bottom of a flat and lightly floured measuring cup, press the dough evenly into a 9 inch tart or pie pan. (If you’re making smaller tarts, depending on the number of pans you have… I had three smaller spring form pans, reduce the recipe by one quarter.) You want it extremely tight in the pan. You’ll need to use baking beans or pie weights for the next step, so line the crust with aluminum foil or parchment paper and add pie weights or dry baking beans.
  7. Bake at 350F (with pie weights) for 18-20 minutes. Remove from the oven and place on a wire rack so it can slightly cool as you prepare the filling.
  8. For the filling: In a clean food processor, blend together the hazelnut butter, tofu (drained), sugar, vanilla, salt, and soy milk until it comes to a super creamy and fluffy consistency.
  9. Spoon filling into tart crust, creating a slight ridge around the outside that can hold in the filling, and place in refrigerator while preparing the topping.
  10. For the sauce: Mix the raspberry jam/preserves with 1-2 T water. Using a wire mesh sieve, press the mixture into the mesh to collect the seedless topping below. (You can also choose to make your our raspberry jam, I just find it to be a little bit of a time saver to by your own and tweak it.)
  11. Spread the raspberry sauce over the top of the tart, staying within the “dam”. Place in tart in refrigerator to chill and set – 4 hours or overnight. When ready to serve, line the edge of the tart with raspberries (bottoms up).

This might be my heaven. Luckily a few bites are already pretty filling, so it’s easily shared. 🙂

After making this amazing tart, I find out C doesn’t like hazelnuts. WHAT!? What crazy person doesn’t like hazelnuts? So not wanting to eat the equivalent of an entire tart by myself, I brought two of the small tarts to work. And they were a complete hit! That creamy nutty filling, the tart raspberries, and crunchy crust is what my summer dreams are made of.

Even though the recipe looks long and maybe a bit overwhelming, I promise that if done in steps, it’s super easy and almost completely fool proof.

Tofu is one of my favorite additions to all things creamy that need some sort of structure. What are some of your favorite “hidden” ingredients?


Kombucha Summer Mocktails

I’ve been trying out some new healthier drink recipes lately (partly for work and partly for me) and even though I love to drink kombucha, I never really thought to put it in a cocktail. And apparently I’m a bit slow to the party because other people have been doing this for a few years now. And of course kombucha makes a good mixer/base – it is bubbly, sour, tangy, and delicious. Oh well, at least I caught the train – even if it’s the end.

Kombucha is a feremented tea beverage and although not thoroughly or independently studied for it’s health benefits, many people have claimed improved gut health and healthier and happier intestinal microbiota. It does have live cultures but exactly which can vary from brew to brew – especially when brewed at home. If you’re interested in learning more about kombucha in a nut shell, I highly recommend the Kombucha Culture episode of Gastropod.

There are so many different flavors of kombucha available in stores that you can fnd almost any base flavor you want or need. For this time around, I picked a classic citrus (you could use a lime too), honeydew (because it just has a nice lightly sweet base flavor but doesn’t overpower when you add other ingredients), and strawberry (because it’s probably my current favorite kombucha flavor at the moment).

You could also totally add some spirits to these, but for a refreshing work-night drink I’m keeping then virgin.

And just in time for summer grilling!

The first is a blueberry mojito. Although I made these by the glass, you could also easily make a larger pitcher.

Blueberry Kombucha Mojito

  • 6-8oz lime/citrus kombucha
  • 5-7 mint leaves
  • 1/2 – 1 tsp sugar (for muddling)
  • 1/8 c blueberries
  • Large handful of ice

Muddle the mint leaves and sugar in the bottom of a glass. The grit of the sugar will help in the process of tearing up and bruising the leaves as well as extracting the essential oils. Add most of the berries and continue muddling. Top with ice and pour in the kombucha. Give a little stir with a spoon to mix the contents. Garnish with remaining berries and a spring of mint.

Enjoy on a hot summer day!

The second is a strawberry oregano mocktail. You can experiment with a few different kombuchas if you’d like, but I’d recommend a strawberry or honeydew. I found that the honeydew didn’t overpower the other flavors but left a little sweetness. The only thing I wasn’t super keen about the honeydew kombucha is that the particular brand I bought used artificial sweetener, stevia, to add more sweetness. Not super necessary in my opinion. Again, this recipe below is for one “cocktail” but can easily be multiplied for a larger pitcher.

Strawberry Oregano Mocktail

  • 6-8oz strawberry or honeydew kombucha
  • 1/2 tsp fresh oregano leaves plus a few springs for garnish
  • 1 diced strawberry plus one for garnish
  • 1/2 – 1 tsp sugar (for muddling)
  • Large handful of ice

Muddle the oregano leaves and sugar in the bottom of a glass. The sugar will help in the process of tearing up and bruising the leaves as well as extracting the essential oils. Add the diced strawberry and continue muddling. Top with ice and pour in the kombucha. Give a little stir with a spoon to mix the contents. Garnish with remaining strawberry and a spring of oregano. Leave the fresh oregano in or over the glass as you drink to get a little more of that herby aroma.

If you’ve never tried kombucha or kombucha in a cocktail or mocktail, I HIGHLY recommend doing so. The kombucha adds a nice fizz to any mixed drink and comes with a lot of potential health benefits. At least from my own experience.

Happy summer sipping!

Tell me:  What are some of your favorite summer drinks? Or what says summer in a glass?


Greek Farro Salad

While Greece has made its way into the news within the last 8 years for aspects they’d prefer to move past, it will always be a place that for me is filled with friendly, welcoming people, thousands of years of history, small towns tucked into mountains, and my first real taste of adventure. And I will always remember it and be thankful to this place for turning my fear of food completely around. I realized here what good, fresh food actually tastes like and to not fear gaining a few pounds because life is more important than the size of the waist band on your jeans. In the three months I spent there in 2008, I learned a lot about food – but most importantly that it doesn’t need to be extravagant to be good.

Enter the Greek salad.

Although I like to experiment with making new foods, I find that I sort of stay in a recurring pattern for the lunches I take to work. If I can, I try to make it revolve around a salad or vegetable of some kind. Ideally a salad with a whole lot of protein and healthy fats.

La Pepita Salad usually enters the rotation every other month or so, then occasionally a roasted vegetable and tortellini salad, and then I tended to have a Greek themed salad about every 2-3 months. For the longest time I kept it like a pasta salad with orzo, but after finding whole wheat orzo became too challenging, I began to branch into other similar shaped grains. I landed on farro being the best option. It’s full of fiber and more protein than orzo, and has a great chewy texture while the orzo used to get really mushy soaking up all of the dressing.

Greek Farro Salad

Makes 4 large portions or 6 smaller

Ingredients

  • 1 cup farro, cooked
  • 1 can/15oz garbanzo beans, rinsed
  • 1 large cucumber, quartered and sliced
  • 3 small or 2 medium tomatoes, deseeded and roughly chopped
  • 4oz feta, crumbled
  • 10oz can sliced black olives, drained
  • 1/2 red onion (optional)

Vinaigrette

  • 1/3 c red wine vinegar
  • 1/2 c olive oil
  • 1/2 tsp dijon mustard
  • 1/2 tsp dried basil
  • 1/2 tsp dried oregano
  • Salt and pepper to taste

Directions

  1. Cook the farro – in a large pot, bring water and a pinch of salt to a boil (it doesn’t matter the amount as long as it is at least 2 times as much farro). Add in one cup of farro and cook until farro is tender yet chewy. Most grains will not split open.
  2. While the farro is cooking,  wash and chop the vegetables and place in a large mixing bowl.
  3. Drain excess water and rinse farro under cold water. Dump into the mixing bowl with the rest of the salad ingredients.
  4. Toss to combine.
  5. In a mason jar or other sealable container, shake up the vinaigrette ingredients until well combined.
  6. Pour about half of the dressing over the salad and mix together. Add in as much of the rest of the dressing as you would like to suit your tastes.
  7. The salad holds well for a few days and potentially longer if you dress is on the day you will be eating it.

And although I like black olives, if you want a bit more authenticity, go for some kalamata. For ease of eating lunch, I go with what is already pitted.

The flavors definitely bring me back to those vegetable salads I ate while studying there almost 10 years ago. (Has it already been that long!?) Contrary to what you will see on Greek restaurant menus here in the US, the typical salads did not have lettuce – unless you ordered a green salad which was different than the regular salad of quartered tomatoes, red onions, cucumber, and a block of feta on top.

2008_0223(013)

The authentic Greek Salad – and dinning alfresco is imperative.

Most often if you want the traditional style someplace other than Greece, they may call it a village salad or something to that effect. But whatever you decide to do, get as close to the farm fresh vegetables as you can get – they will make all of the difference.

2008_0214(008)

Greece, I love you and some day I’ll be back. And until that time, I’ll try to recreate some of my favorites to the best of my ability.

What are some favorite foods from your travels and have you tried to re-create them?


Creamy Roasted Hazelnut Butter

About five or six years back, I was in a Middle East specialty grocery store and found a jar of hazelnut butter.  Not just the normal Nutella themed chocolate and hazelnut, but straight up hazelnut butter and it was delicious! Since that time I have yet to locate it in another grocery store and I’m too lazy and/or cheap to buy it online when it’s so easy to make!

Basically, so stupidly easy I’m kicking myself for not doing it sooner, but to be fair, I was on a regular old peanut butter kick and then cashew butter – both also delicious.

Creamy Hazelnut Butter

Makes about 2 cups

Ingredients

  • 1 pound raw hazelnuts
  • 1/2 tsp salt
  • 1 T sugar, honey, or agave
  • 1/2 tsp vanilla

Directions

  1. Preheat over to 350F.
  2. Arrange hazelnuts on a foil lined baking tray and roast in the over for 7-10 minutes or until a light golden brown.
  3. Let cool just slightly and transfer to a clean towel. To remove the skins of the hazelnuts (they’re kind of bitter), scoop the hot hazelnuts into a pile in the center of the towel (take care due to the high heat of the nuts). Bring the four corners of the tea towel together and gather it up in one hand, so that all of your hazelnuts are scooped up in the bottom of the tea towel. Using your other hand, squish the bottom and the sides of the tea towel so that all the hazelnuts are rubbing up against each other. Do this for a couple minutes until most of the skins are removed.
  4. Separate out the skins from the nuts. I use a slotted serving spoon – it’s big enough to get more than a few nuts at a time and the holes are small enough that the nuts won’t fall through but the skins will.
  5. Place warm nuts* in a food processor and grind until smooth. Add in vanilla, salt, and sweetener (if desired) and continue to blend until a smooth butter is formed – yes, it should be kind of runny. If it hasn’t yet reached that consistency, just be patient, it will get there.

*Warm nuts tend to work a little better and faster by making the oil more available during the processing.

You can keep it stored in an air tight container. I like mason jars because you can easily see through them and they store about 2 cups perfectly.

My hazelnut butter is a little on the darker side because I toasted the nuts just a bit extra. If you like you’re lighter, just watch very closely and removed when they’ve gathered just a hint of golden. You can also make the butter raw, but won’t be able to remove the skins. Just a bit of trade offs. I also added a touch of sweetness to mine because I was trying to get as close as possible to the flavor I found in that Middle East grocery (which was akin to the chocolate hazelnut without the chocolate, but still some sweetness).

Stick around for a to-die-for dessert coming to the blog in the next couple of weeks that features this fantastic spread – hazelnutty goodness.

What are your favorite nuts butters? Do you stick with the classic peanut butter or almond or branch out into walnut, pecan, cashew, and hazelnut?


Finally Official! We’re Married!

All images are by Alchemy Creative and use without written permission and notification is prohibited. 

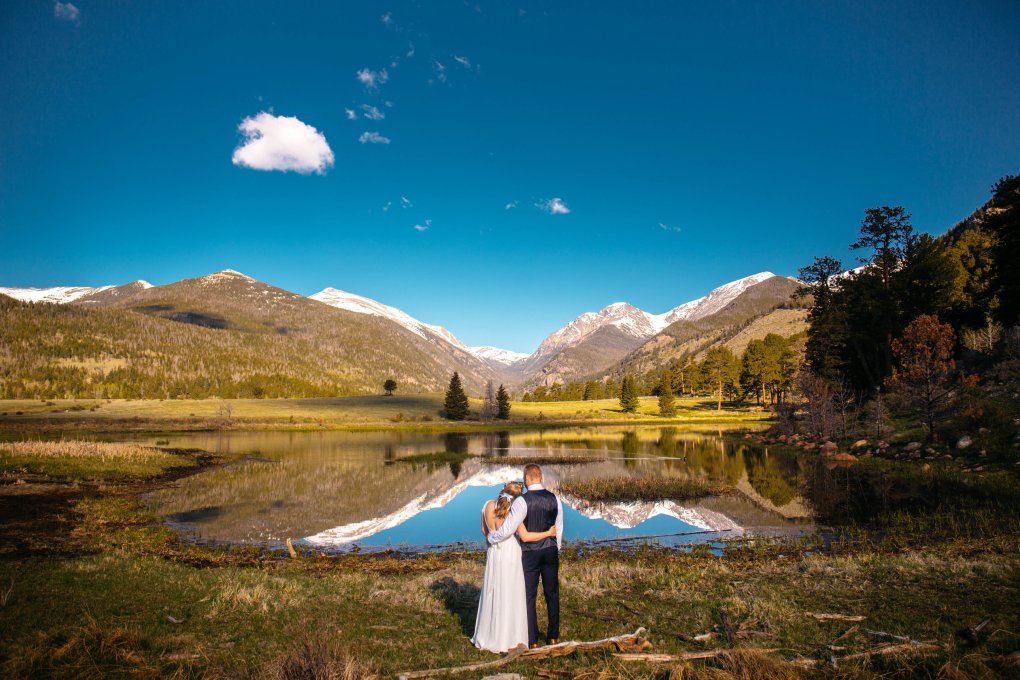
A few weeks back, C and I had ourselves a small wedding/elopement in Colorado’s Rocky Mountain National Park. While this is typically a food and wellness blog, sharing some of the exciting moments in my life has got to be a part of it, so just bear with me if you’re just here for the food.

rockymountainnationalparkelopement-spraguelake-ingridcole-329

Toward the end of 2016, C and I finally decided to make things legal and start planning the wedding that was right for us. Maybe someone is wondering, why now? Why didn’t you tell anyone? Why didn’t you want all the pomp that goes into celebrating a wedding and beginning of a marriage? For the why – basically I finally got over my marriage issues and C eventually convinced me with his explanations of all of the legal benefits to it. (…I know, we’re super romantic.) So once I was convinced, knowing he would NEVER ask outright, I asked him one evening if we should set a date to get married and make everything legal – and he said “sure”. (The stuff of fairy tales, right?) I didn’t want an engagement ring, just a wedding band, so it worked well with our plans of doing an elopement and not really telling anyone outside of our small group of attendees.

rockymountainnationalparkelopement-spraguelake-ingridcole-26.jpg

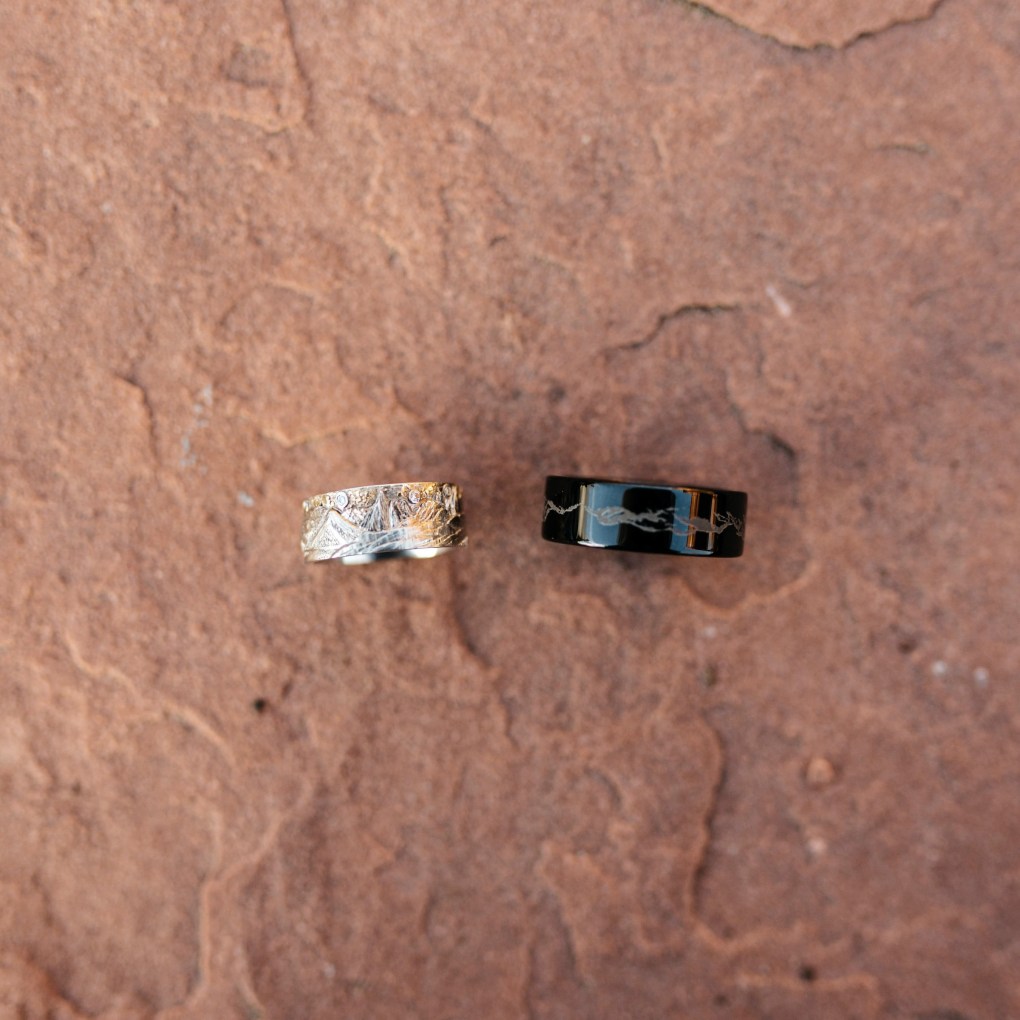
Our rings!! Mountain inspired!

When we talked about getting married, we always pictured something small – maybe even eloping just the two of us. We decided to do a small casual ceremony in which we married/officiated ourselves (something you can do in Colorado) and since the location was remote with restrictions on number of guests, decided to include our immediate families and a few close long time friends. While I have no problem speaking in front of a couple hundred people, C is much the extrovert, and we both love hosting a good party, the decision to get married and how was very personal and intimate to us. We wanted to keep as close as possible to what we needed from the day. Any party later!

BUT, I am very excited to share pictures and talk about all the wonderful people who helped make things happen.

C and I arrived in Boulder on a rainy Tuesday evening, quickly changed and went for a nice dinner at The Kitchen. Wednesday was still raining, so we spent the day exploring some of Boulder’s breweries and getting our marriage license. That evening we ate at Bramble and Hare (highly recommend!) before hitting the road to arrive in Estes Park for the evening. Thursday we explored the park and did some hiking and by evening everyone was starting to arrive. We spent Friday enjoying time with people and then went to dinner at Cascades Restaurant at The Stanley. To make everything easy, everyone stayed at Mary’s Lake Lodge in Estes Park for the long weekend.

We woke up bright and early Saturday to get ready for our morning nuptials. Our fantastic photographer, Brittany from Alchemy Creative, arrived at 6am along with my mom and older sister to help with a few last details.

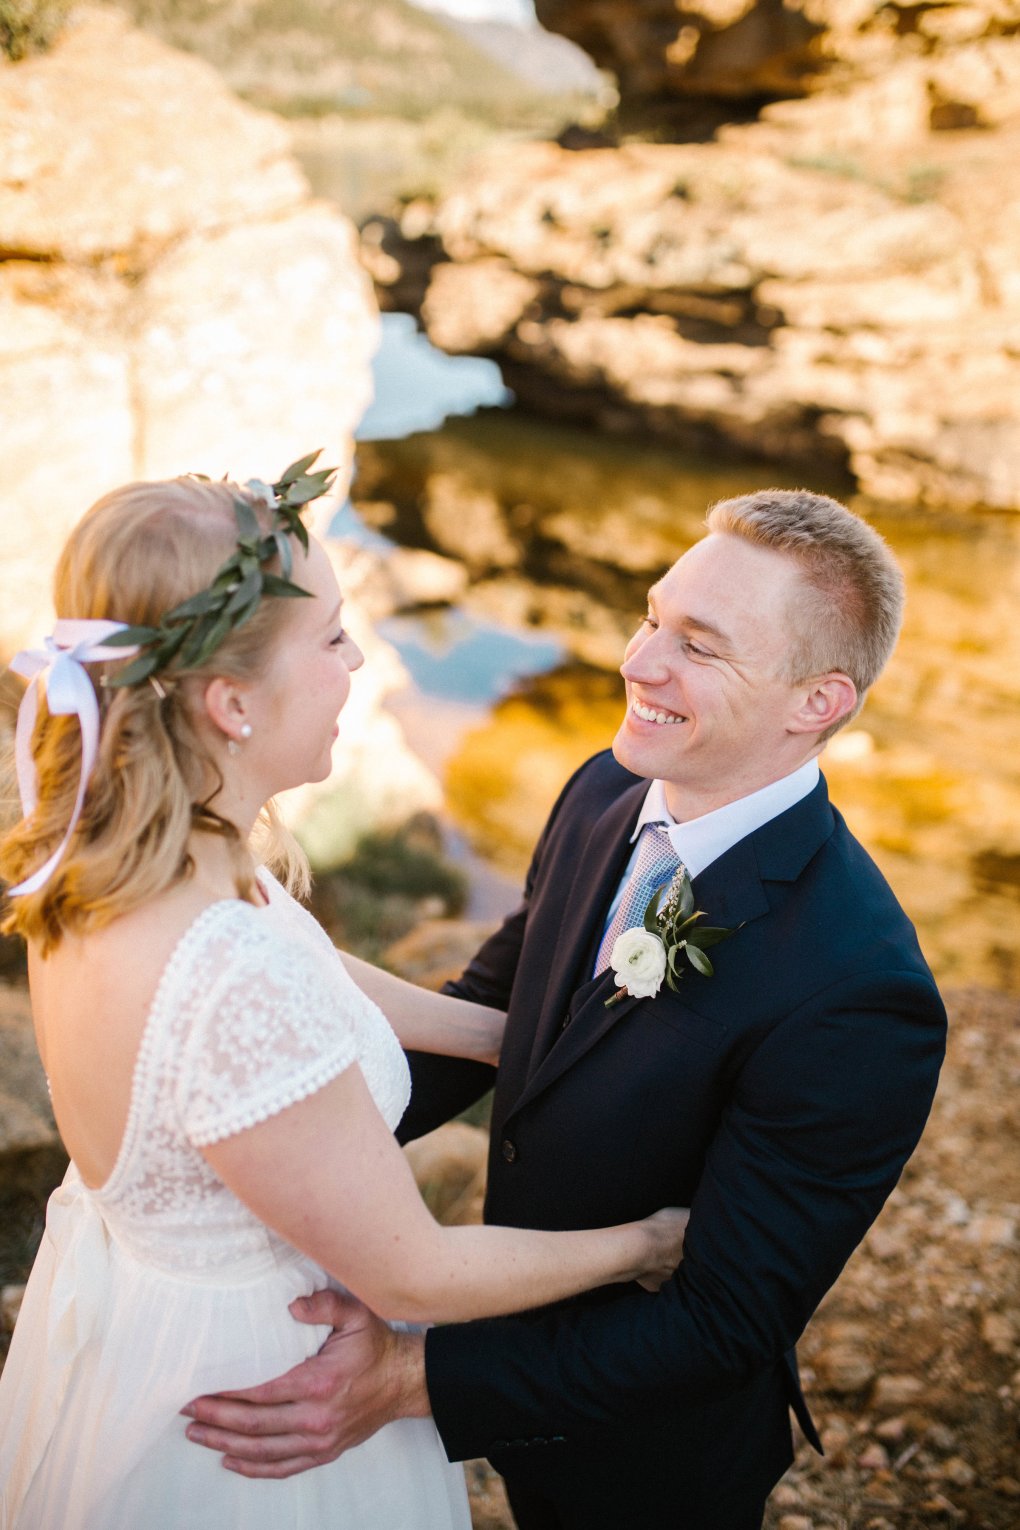
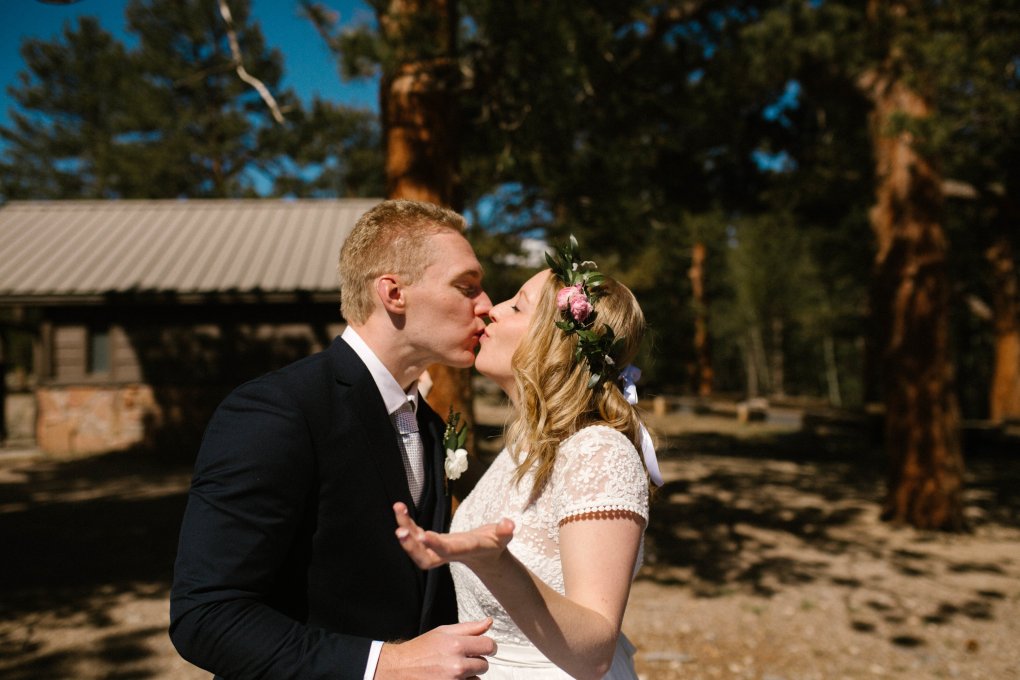
Since C and I got ready together except for my dress, which he hadn’t seen yet, we didn’t have far to go for our first look.

rockymountainnationalparkelopement-spraguelake-ingridcole-98

We went down to Mary’s Lake, right next to the lodge before we would set out to the park.

rockymountainnationalparkelopement-spraguelake-ingridcole-117

rockymountainnationalparkelopement-spraguelake-ingridcole-118

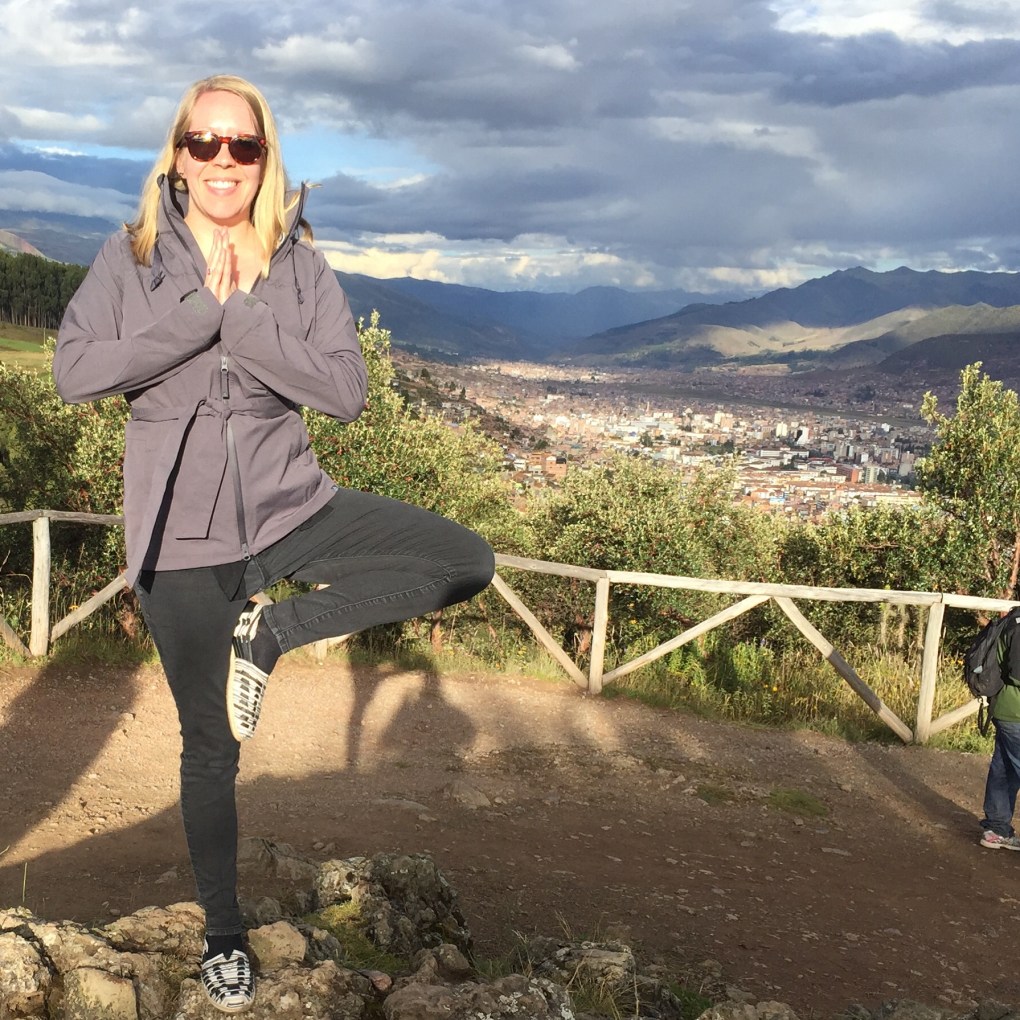
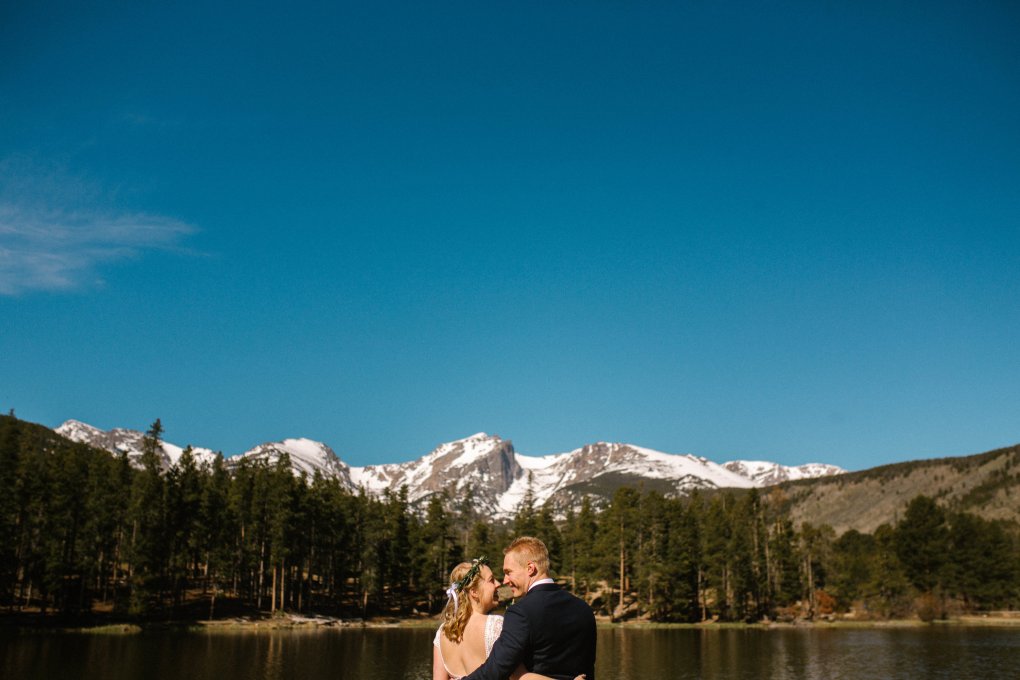
Can’t decide if the view behind me or in front of me is more spectacular.

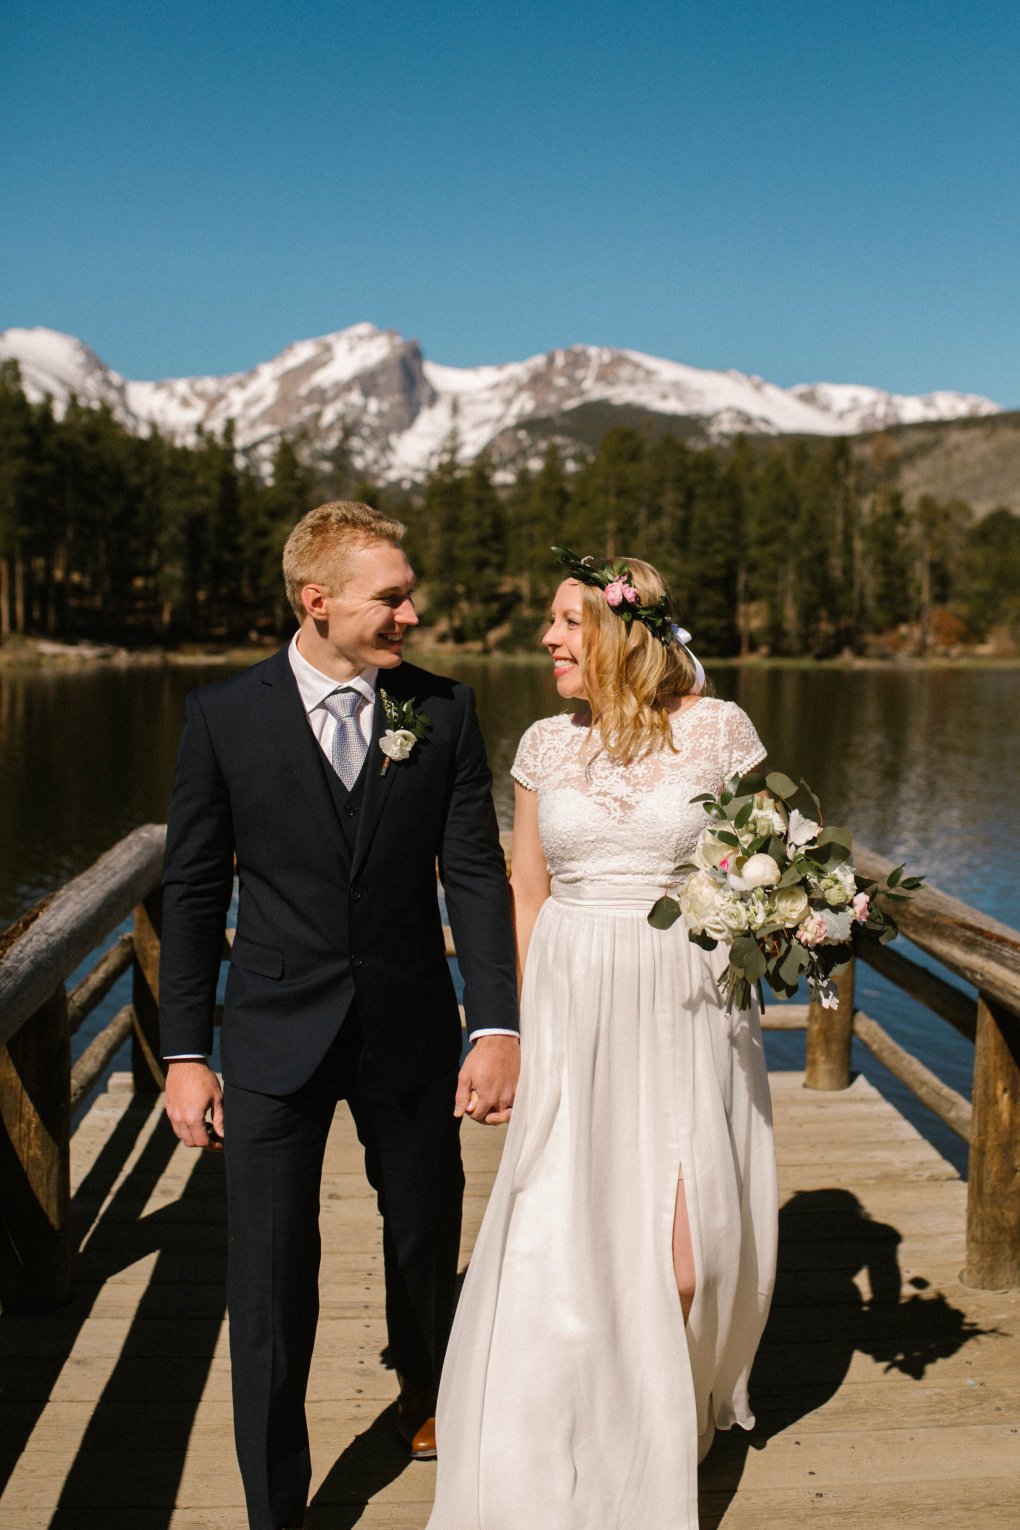
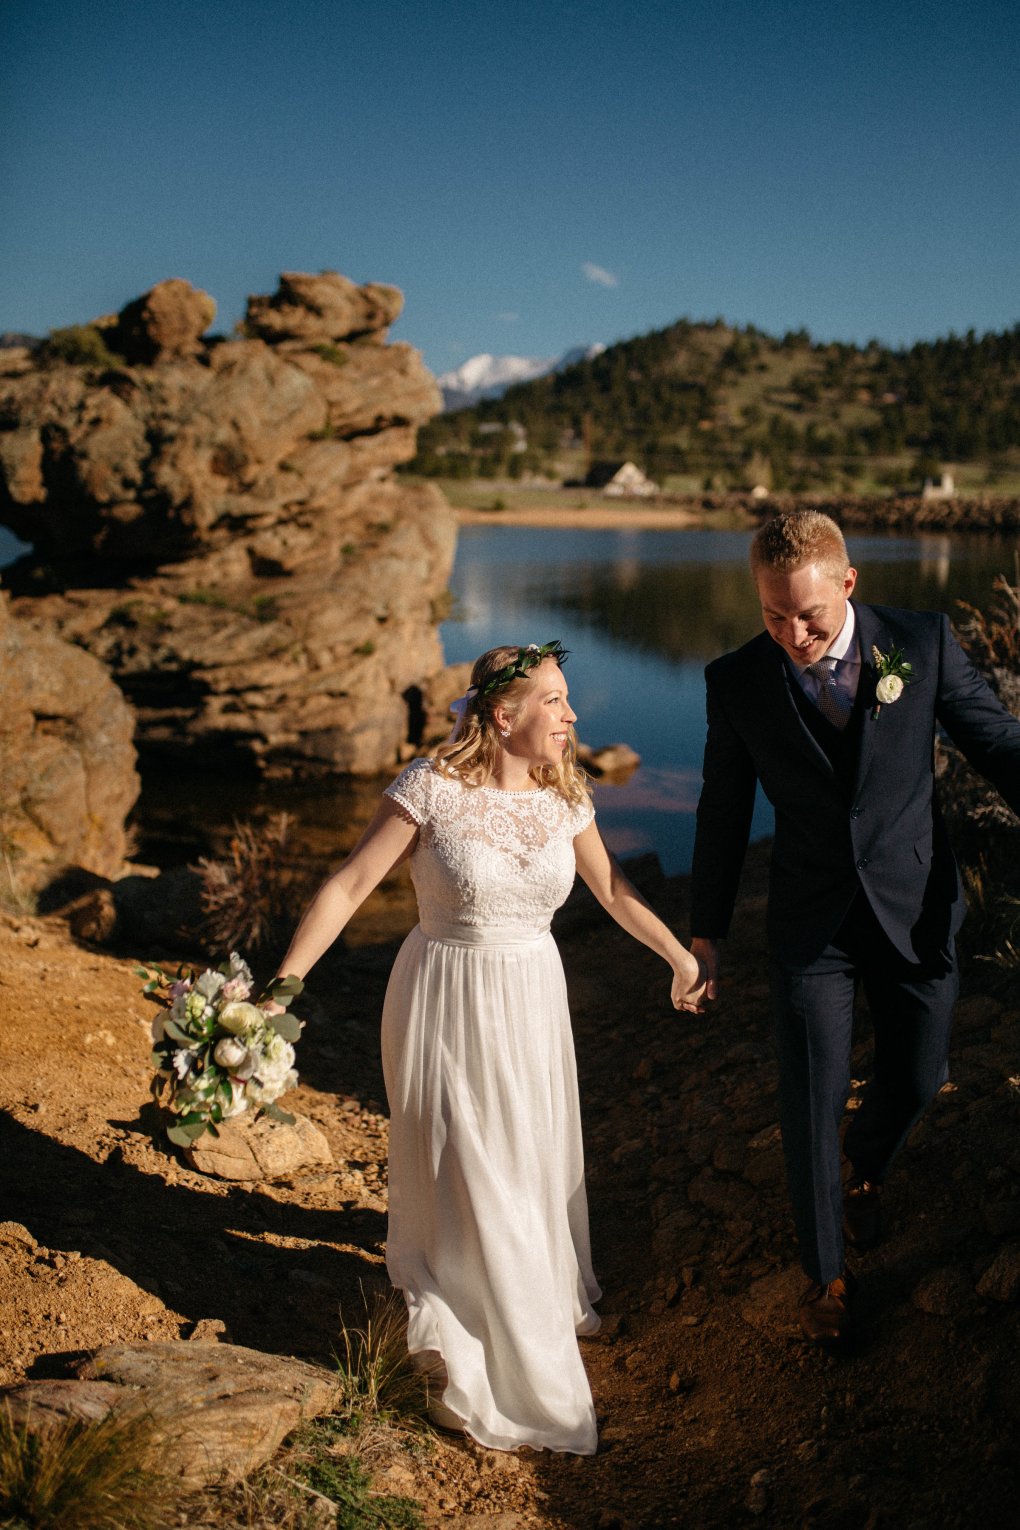
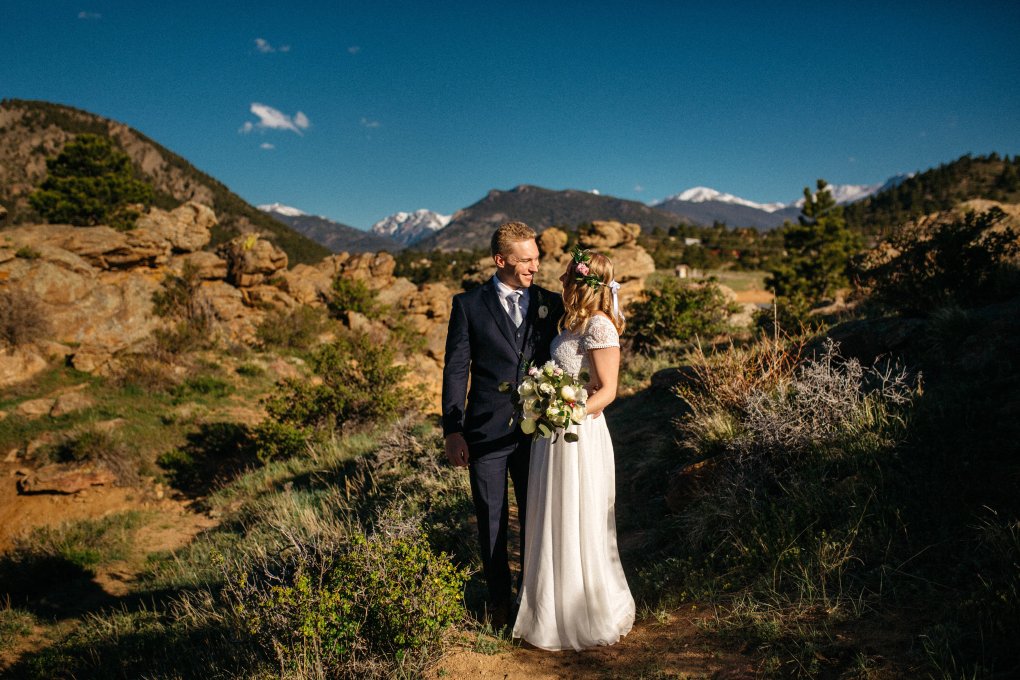
As we drove into the park, the view kept becoming more and more amazing. Early May still had all of the snow on the mountains and we really lucked out with fantastic weather! (It was supposed to rain all weekend. And the following weekend they got 31″ of snow!)

rockymountainnationalparkelopement-spraguelake-ingridcole-146

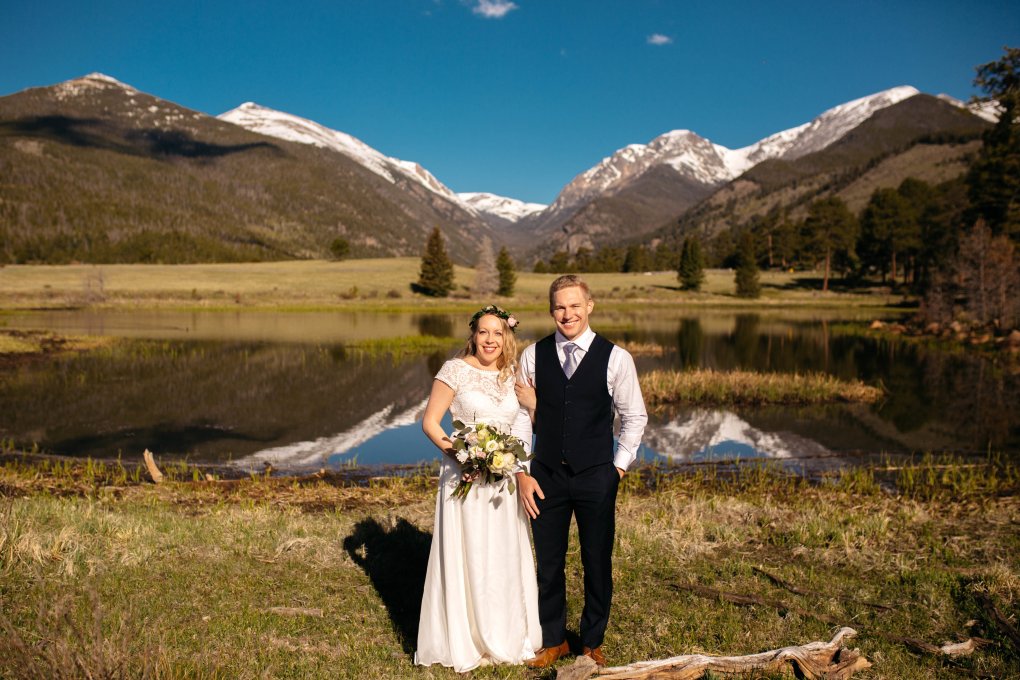
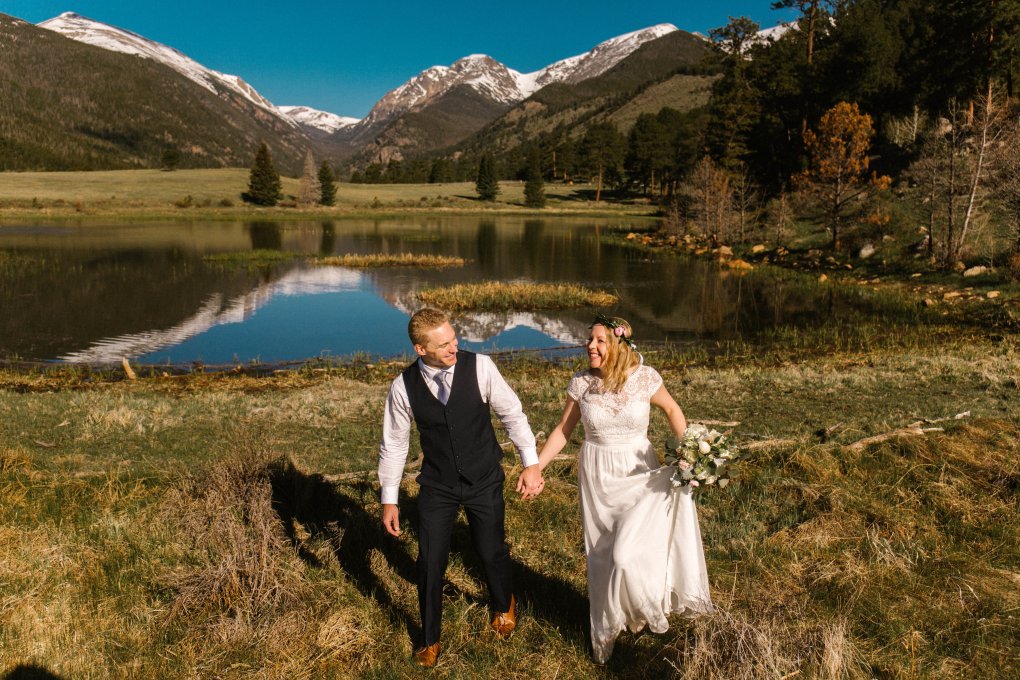
We went over for some pictures at Sheep’s Lakes first – despite all of the rain earlier in the week, the ground wasn’t wet and the water was still enough to capture these gorgeous reflections.

rockymountainnationalparkelopement-spraguelake-ingridcole-158

(I’m holding off on completely overwhelming y’all with pictures – trying to pick just one or two from each location.  It’s so difficult!).

rockymountainnationalparkelopement-spraguelake-ingridcole-165

Find a partner you want to travel the world with – because where they are, you’re home.

Around about 9am we were back over at Sprague Lake for our vow exchange and to meet up with everyone else. All total we were a group of 24.

rockymountainnationalparkelopement-spraguelake-ingridcole-266

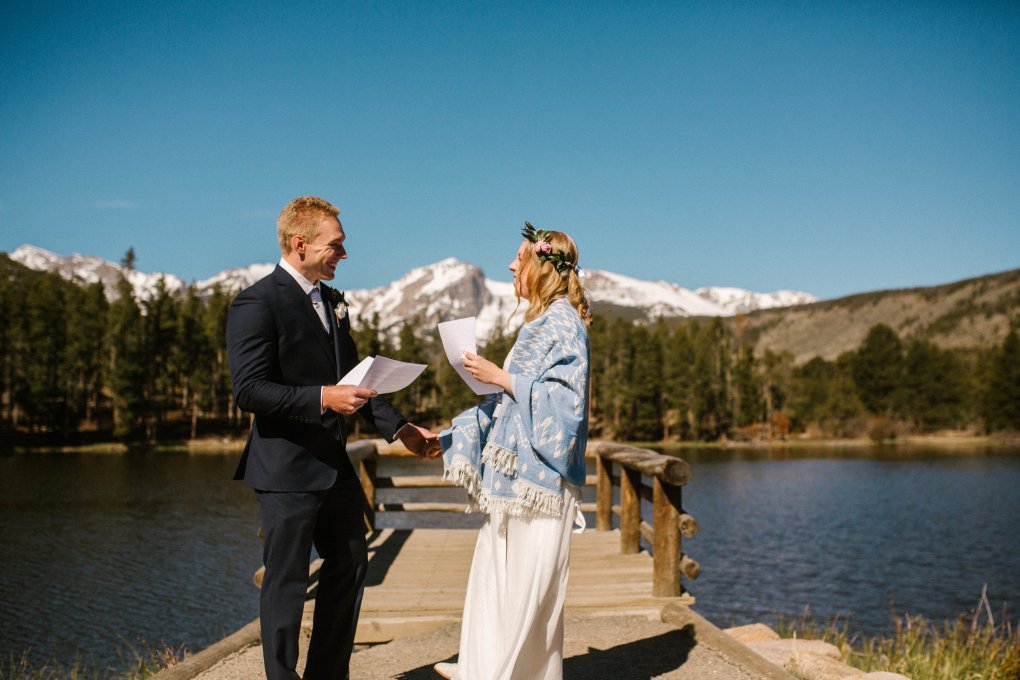
We said our vows (which, btw, I completely cried through all of mine) and did our exchange of rings. We did a self uniting ceremony, which was completely perfect for us, but also meant we couldn’t just repeat after someone and needed some scripts. 🙂

rockymountainnationalparkelopement-spraguelake-ingridcole-288

A huge thank you to both of our families for traveling to the mountains to share in our day!

rockymountainnationalparkelopement-spraguelake-ingridcole-176

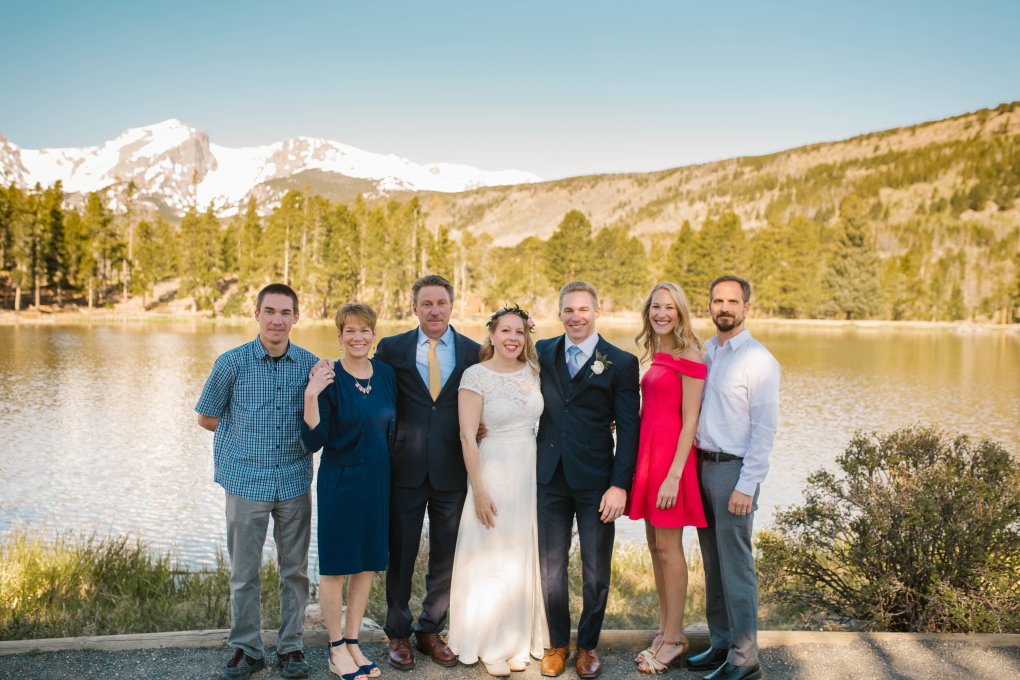
Very luckily to be welcomed into such a fun loving family.

rockymountainnationalparkelopement-spraguelake-ingridcole-294

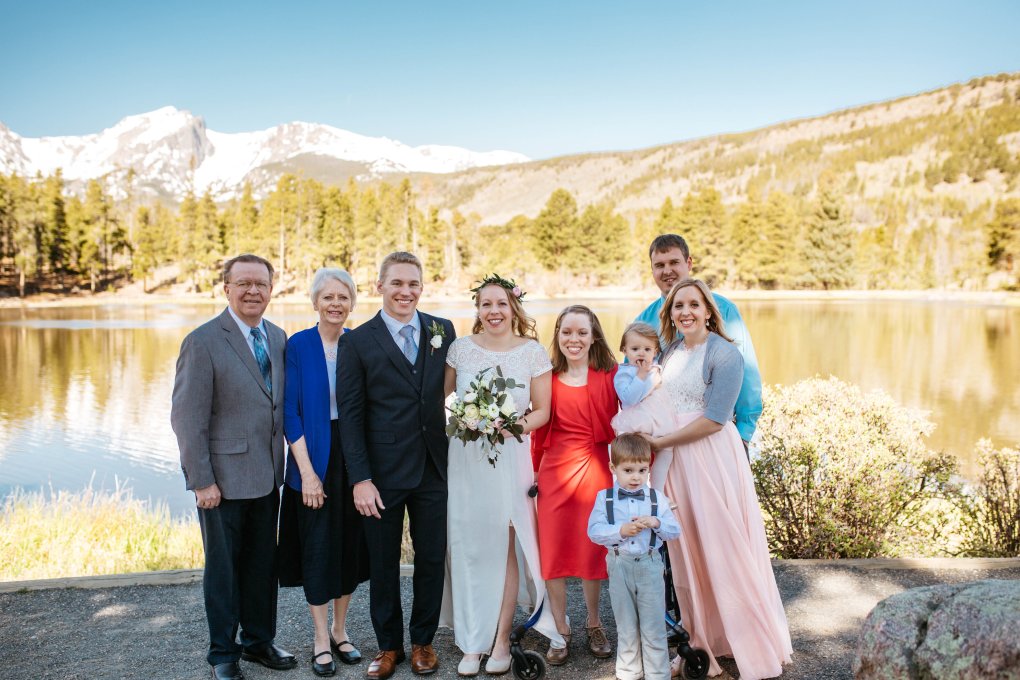
My lovely, lovely family – and super cute niece and nephew who make every picture special.
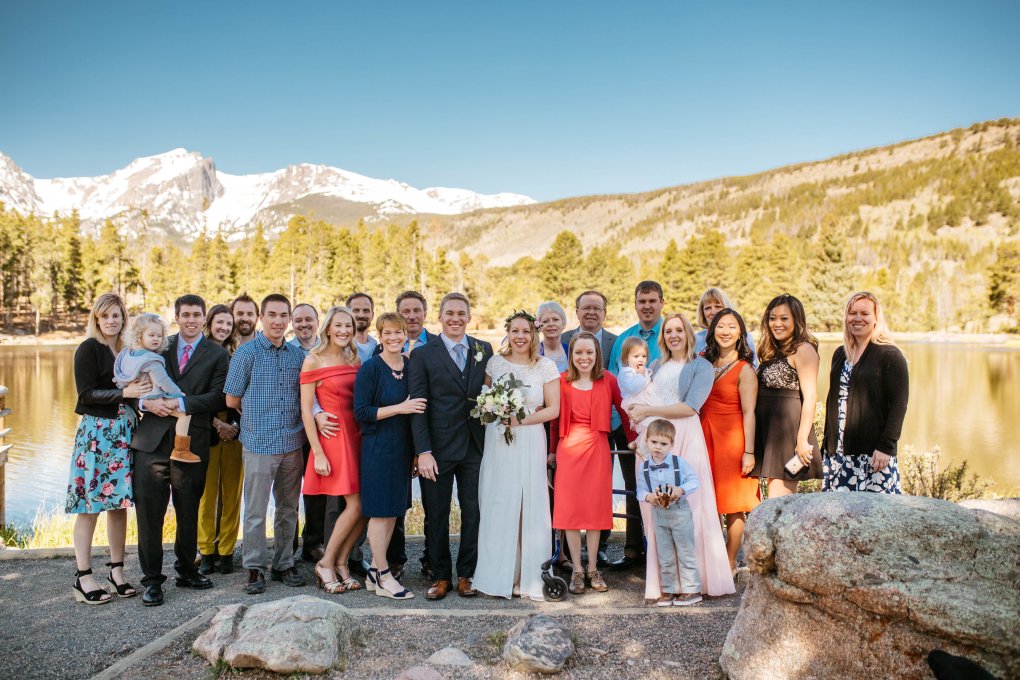
rockymountainnationalparkelopement-spraguelake-ingridcole-291

The whole gang!

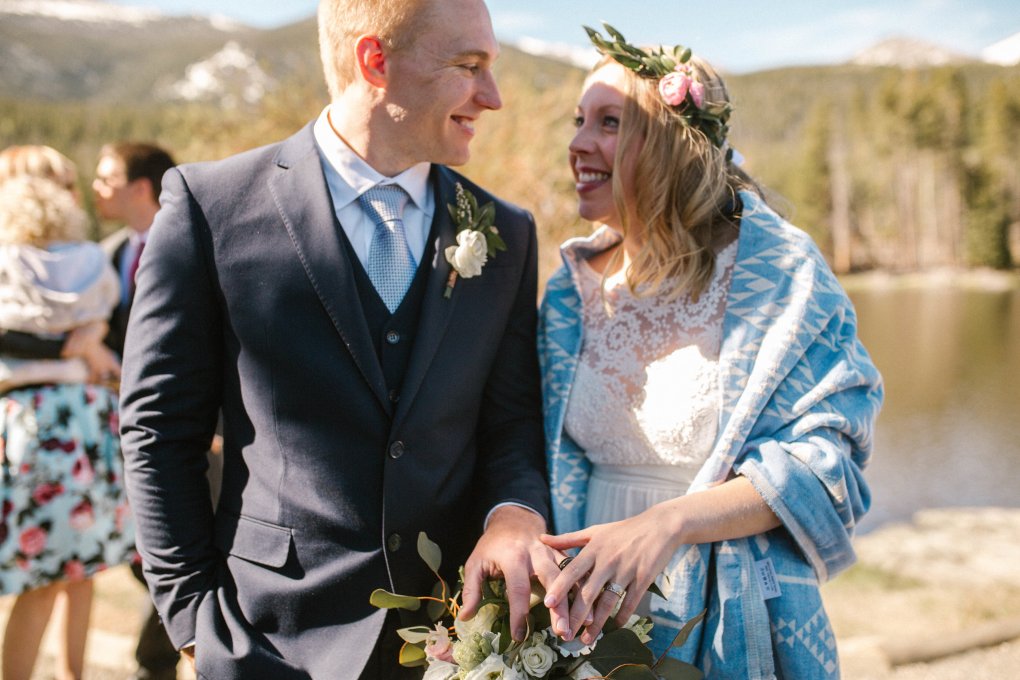
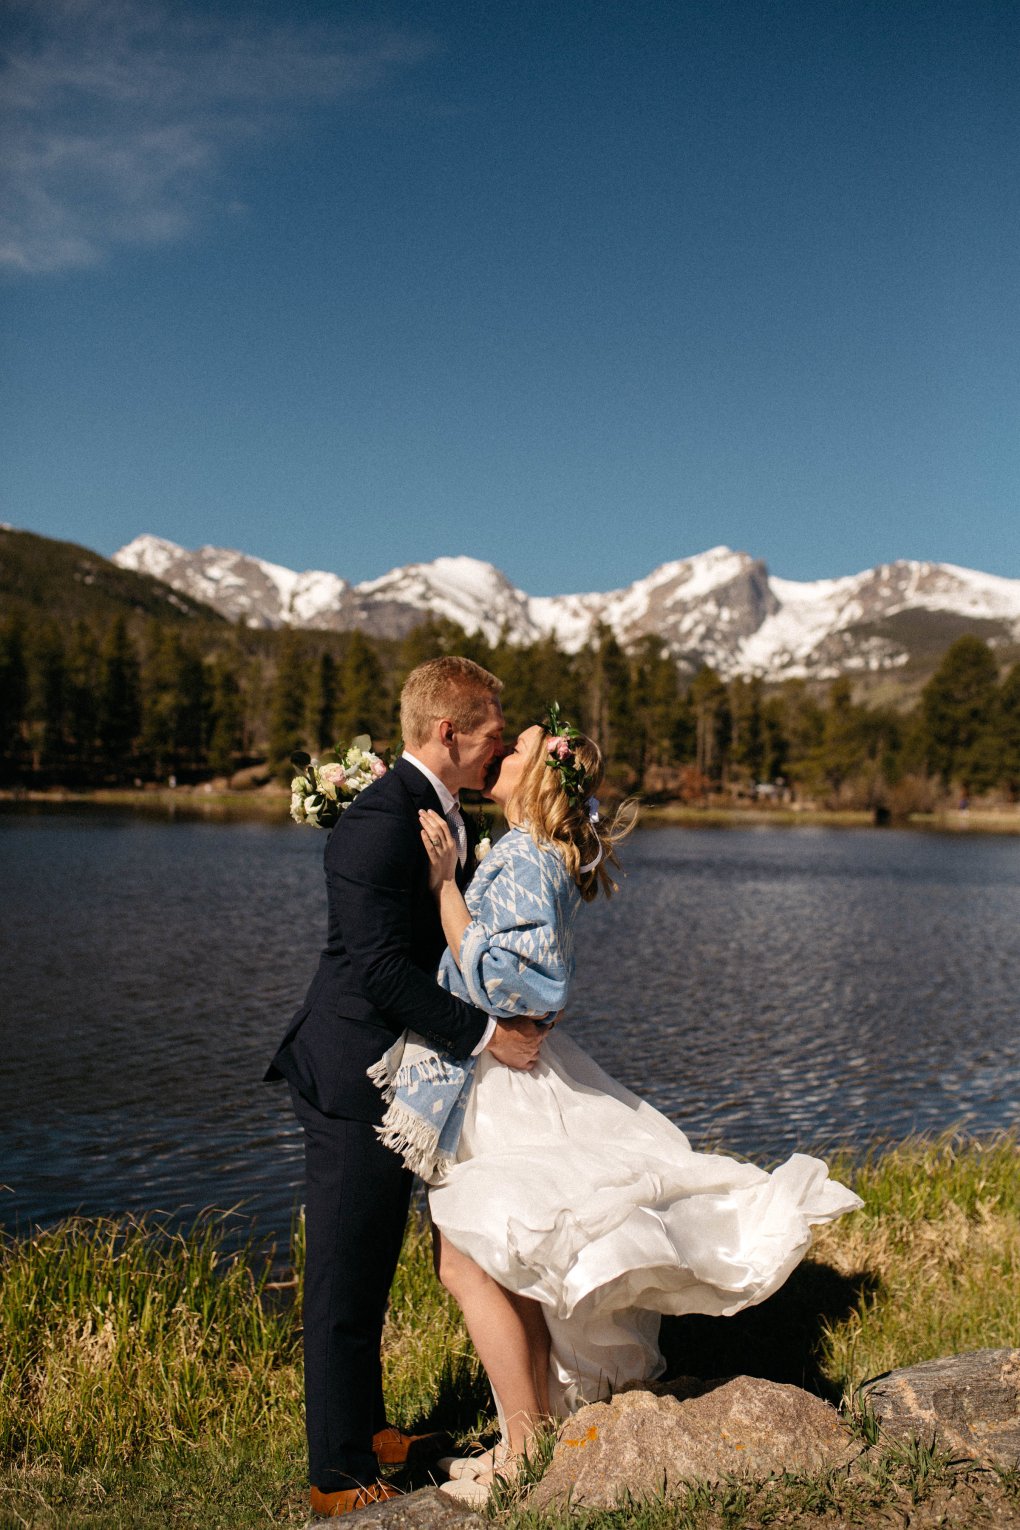
After one last smooch…

rockymountainnationalparkelopement-spraguelake-ingridcole-345

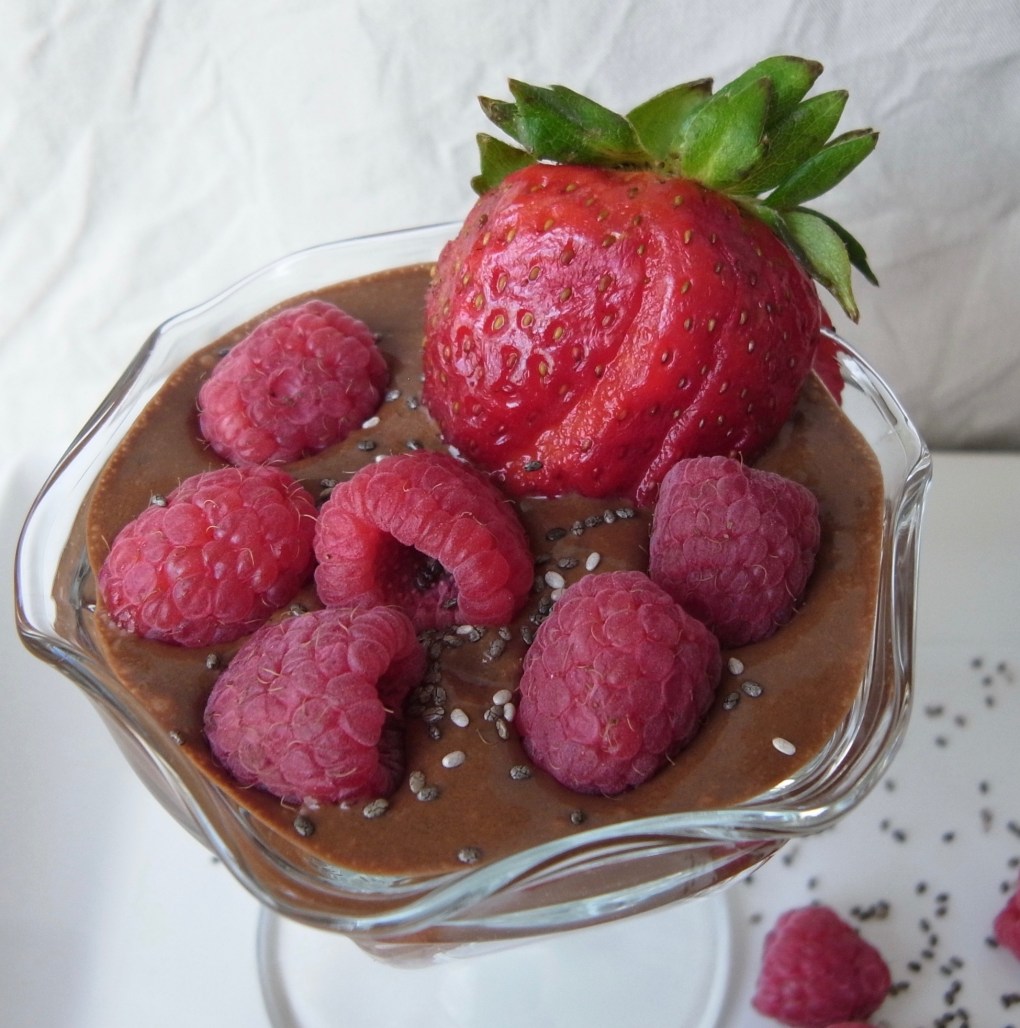
it was time to get some food in our bellies!

We did coffee, tea, and hot chocolate. And instead of a cake, did a cinnamon roll tower!

rockymountainnationalparkelopement-spraguelake-ingridcole-380

After everything at the park, we headed back to the lodge for some brunch-y foods hosted at the condo rented by my family. Then in the early afternoon we had our official wedding lunch at Tavern 1929 – the food was great and so were the views! Since we’re doing a couple “receptions” later with the rest of our family and friends, we wanted a low key lunch where we didn’t need to decorate anything, no gifts were expected, and everyone could order whatever they wanted off the menu. The Tavern didn’t push us into anything or make any comments once we arrived – me dressed in a white dress. It was the perfect day.

rockymountainnationalparkelopement-spraguelake-ingridcole-324

Vendors:

  • PhotographyAlchemy Creative (one incredibly talented photographer and perfect person to capture our elopement)
  • DressDreamers and Lovers, Natalie Gown
  • Blanket – Kilim Throw from Turkish T
  • My ringWaylon Rhoads Jewelry (Seriously gushing over this ring – he custom made everything, even the mountains where carved off of three picture I gave him. Serious talent and highly, recommended if you’re looking for any piece of custom jewelry.)
  • FlowersBoulder Blooms
  • Cinnamon RollsCinnamon Cafe (she even put sprinkles on them after telling her they were for our wedding cake! and probably the best rolls I’ve ever had.)
  • Jewelry – mixed from two stores off Etsy – jacket from Tosh Jewelry and pearls from Pearl Kissed.
  • His ringRing Paradise, custom mountain etched
  • His suit – custom from Final Stitch in Albuquerque

This slideshow requires JavaScript.

Ok, totally lied. Here are a few others I absolutely love!


Chocolate Chia Seed Pudding

A few weeks back, we were discussing different recipes for chia seed pudding. I had tried to make it in the past with almond milk, but the seeds always seemed to sink and clump up on the bottom. A co-worker suggested trying coconut milk if I wasn’t able to drink regular cow’s milk, so I did and now I’m hooked on the stuff! My favorite is plain with lemon curd (maybe I’ll share that in the future as well).

For today, I branched out a bit from the 3 Pleasures Dessert theme (dark chocolate, nuts, and fruit) to drop the nuts and do seeds instead – chia seeds! Chia seeds have fiber, protein, and most importantly healthy omega-3 fatty acids. The cocoa provides a rich/somewhat bitter chocolate taste that can satisfy just about any craving.

R0016994

If you’re looking for a more mousse like consistency and to have it ready in less time than overnight, you can put it into a blender. 🙂

R0016996

Chocolate Chia Seed Pudding

Serves 2 when sharing

Ingredients

  • 1 c plain coconut milk, room temp or warm works best
  • 1/4 c chia seeds
  • 1/4 c cocoa powder
  • 1 T granulated sugar
  • 1 tsp vanilla, optional
  • Favorite fruit to serve – I recommend raspberries or strawberries

Directions

  1. Measure all ingredients, except fruit, into a mason jar.
  2. Shake well for about a minute. It will be easier to mix in the cocoa powder without clumping if the coconut milk is warm or room temperature.
  3. Let sit a few minutes and shake a second time if seeds seem to settle to the bottom too quickly.
  4. Place in refrigerator overnight to allow seeds to “gel” and create a pudding like texture.
  5. Serve with fresh berries.

*The texture will still have the seeds since they don’t dissolve, but if a creamy texture is paramount in your pudding, I suggest the blender method – blend all ingredients instead of shaking and let sit a few hours in the refrigerator or until mixture is desired thickness.

R0016999

Have you tried chia seed pudding or using chia seeds in smoothies or over oats?